Table of Contents
Ready to unleash your inner artist? This guide is your passport to the exciting world of paper cut out numbers! Whether you're a seasoned crafter or a curious beginner, we'll walk you through everything you need to know to create beautiful, unique paper cut out numbers. We'll cover the basics, from choosing the right tools and techniques for precise cuts to finding inspiration for your designs. Imagine the possibilities: whimsical decorations for birthday parties, personalized classroom accents, or intricate elements for your next mixed media project. This article is your one-stop shop for all things "paper cut out numbers," offering step-by-step instructions, design ideas, and creative project suggestions. Get ready to transform simple paper into stunning works of art. Let's dive into the fun and learn how to make amazing paper cut out numbers!
Creating Your Own Paper Cut Out Numbers
Creating Your Own Paper Cut Out Numbers
First, you'll need a plan! Sketch out your numbers on paper. Think about the style – are you going for bold, simple numerals, or something more intricate? Maybe you want to try a fun font, or create numbers with unique shapes, like flowers or animals? The possibilities are endless! Remember, you can always find inspiration online; check out sites dedicated to paper cutting designs for tons of ideas. Don't be afraid to experiment and let your creativity flow!
Once you've got your design, carefully trace it onto your chosen paper. Consider the paper's thickness and texture. A thicker paper will give you more sturdy numbers, perfect for decorations that need to last. But thinner paper allows for more delicate designs. For a guide on choosing the perfect paper, check out our ultimate guide: Choosing the Right Paper. Experiment with different types to see what works best for you!
Paper Type | Pros | Cons |
|---|---|---|
Cardstock | Durable, holds detail | Can be difficult to cut |
Construction Paper | Easy to cut, bright colors | Less durable |
Scrapbooking Paper | Variety of designs and textures | Can be thin |
Now, the exciting part: cutting! If you're new to paper cutting, start with simpler designs. Practice makes perfect! Using sharp scissors or an X-ACTO knife (always with adult supervision if you're under 18!), carefully cut along the lines of your design. If you're using a knife, remember safety first! Learn more about paper cutter safety here: Paper Cutter Safety.
Once you've mastered the basics, you can try more advanced techniques, such as creating layered numbers or adding intricate details. Don't be afraid to make mistakes – they're part of the learning process! For some amazing techniques, check out our guide on mastering paper cutting techniques: Mastering Paper Cutting Techniques.
- Start with simple designs.
- Use sharp tools for clean cuts.
- Practice patience and precision.
- Don't be afraid to experiment!
Tools and Techniques for Perfect Cuts
Tools and Techniques for Perfect Cuts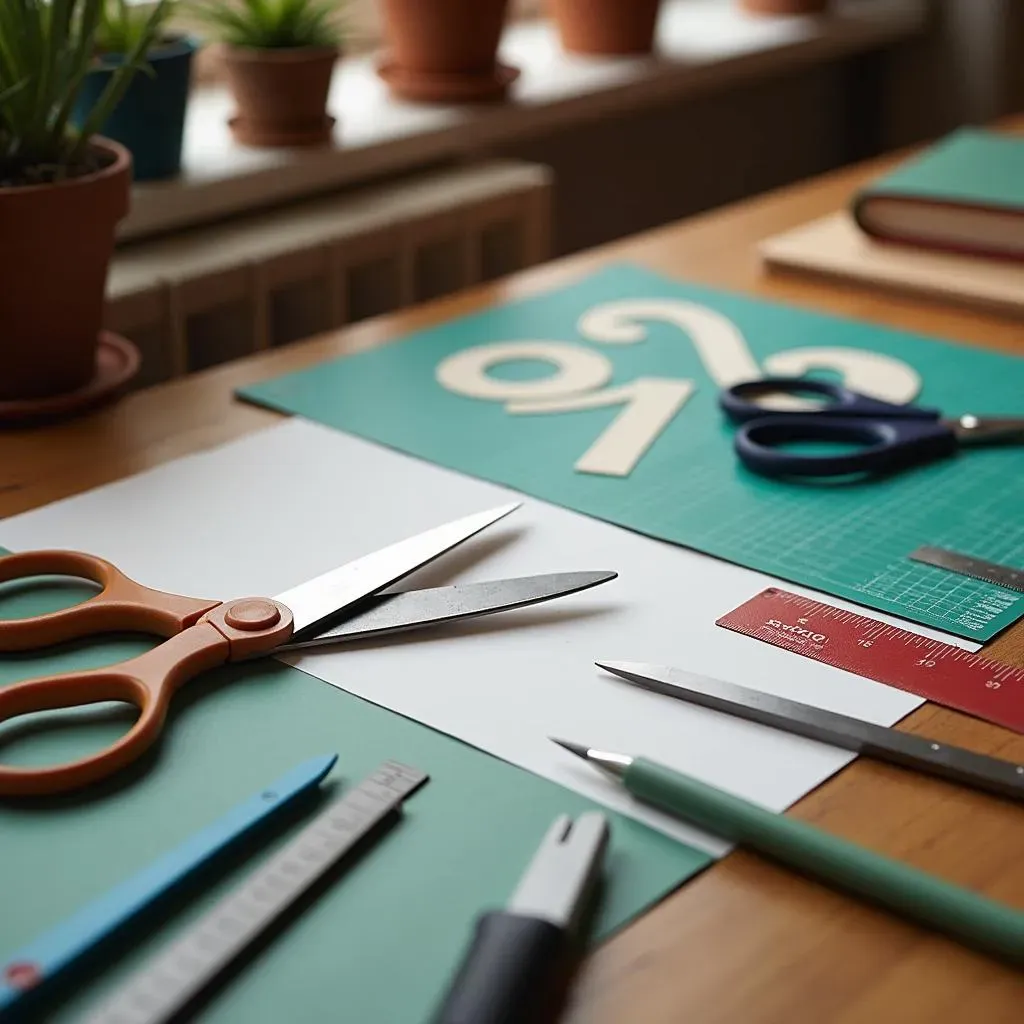
Choosing the Right Tools
Let's talk tools! Sharp scissors are your best friend for most paper cut out number projects. Look for a pair with comfortable handles and blades that can make precise cuts. For intricate details or thicker paper, an X-ACTO knife (or similar craft knife) is a great option. Remember, adult supervision is a must for younger crafters using knives. Always use a cutting mat to protect your work surface. For more on choosing the right paper cutter, check out our guide on Swingline Paper Cutters.
Beyond the basics, consider adding a few extra tools to your arsenal. A self-healing cutting mat is a lifesaver, protecting your table and keeping your blades sharp. Tweezers can help you with those tiny, fiddly bits that are tricky to reach with scissors. And don't forget a ruler for straight lines! Accurate cutting makes all the difference in the world, especially when you're working with numbers. If you're feeling adventurous, you might even want to explore using a paper cutter for larger projects; just remember to be careful! For more tips on safety, check out this guide on Are Paper Cutters Dangerous?.
- Sharp scissors
- X-ACTO knife (with adult supervision)
- Self-healing cutting mat
- Tweezers
- Ruler
Mastering Cutting Techniques
Now for the fun part – actually cutting! Start by practicing on scrap paper. Get a feel for how your chosen tool handles and how much pressure you need to apply for clean cuts. For straight lines, use a ruler as a guide. For curves, take your time and make small, controlled cuts. Don't rush! Remember, patience is key when it comes to paper cutting. For some awesome cutting tips, check out our detailed guide to Mastering Paper Cutting Techniques.
When cutting intricate designs, consider using different techniques to achieve different effects. For instance, you can use a small, sharp blade for fine details and larger scissors for broader cuts. Experiment with different angles and pressures to create varied lines and textures. Don't be afraid to try different approaches to find what works best for you. And remember, even experienced crafters make mistakes sometimes – it's all part of the learning process! If you happen to cut yourself, don't panic. We have a guide on What to do when you have a paper cut.
Technique | Description | Best for |
|---|---|---|
Straight Cut | Using a ruler as a guide | Sharp lines, clean edges |
Curve Cut | Small, controlled cuts | Rounded shapes, flowing lines |
Detailed Cut | Small, precise cuts | Intricate designs, fine details |
Adding Finishing Touches
Once you've finished cutting, you might want to add some finishing touches to make your paper cut out numbers even more special. Consider using markers, colored pencils, or paint to add color or details. You could also use glitter glue, stickers, or other embellishments to make your numbers stand out. There are endless possibilities! Get creative and have fun with it! For more inspiration, check out our guide on Paper Cutting Frames.
To protect your finished numbers, you might want to consider laminating them or sealing them with a clear sealant. This will help to prevent them from getting damaged or faded. And don't forget to think about how you'll display your creations! You could mount them on cardstock, frame them, or use them as part of a larger project. The options are endless, so let your imagination run wild! For more inspiration, check out our guide on Mastering Paper Cutting Crafts.
- Coloring
- Embellishments
- Laminating or sealing
- Display methods
Design Ideas and Inspiration for Paper Numbers
Design Ideas and Inspiration for Paper Numbers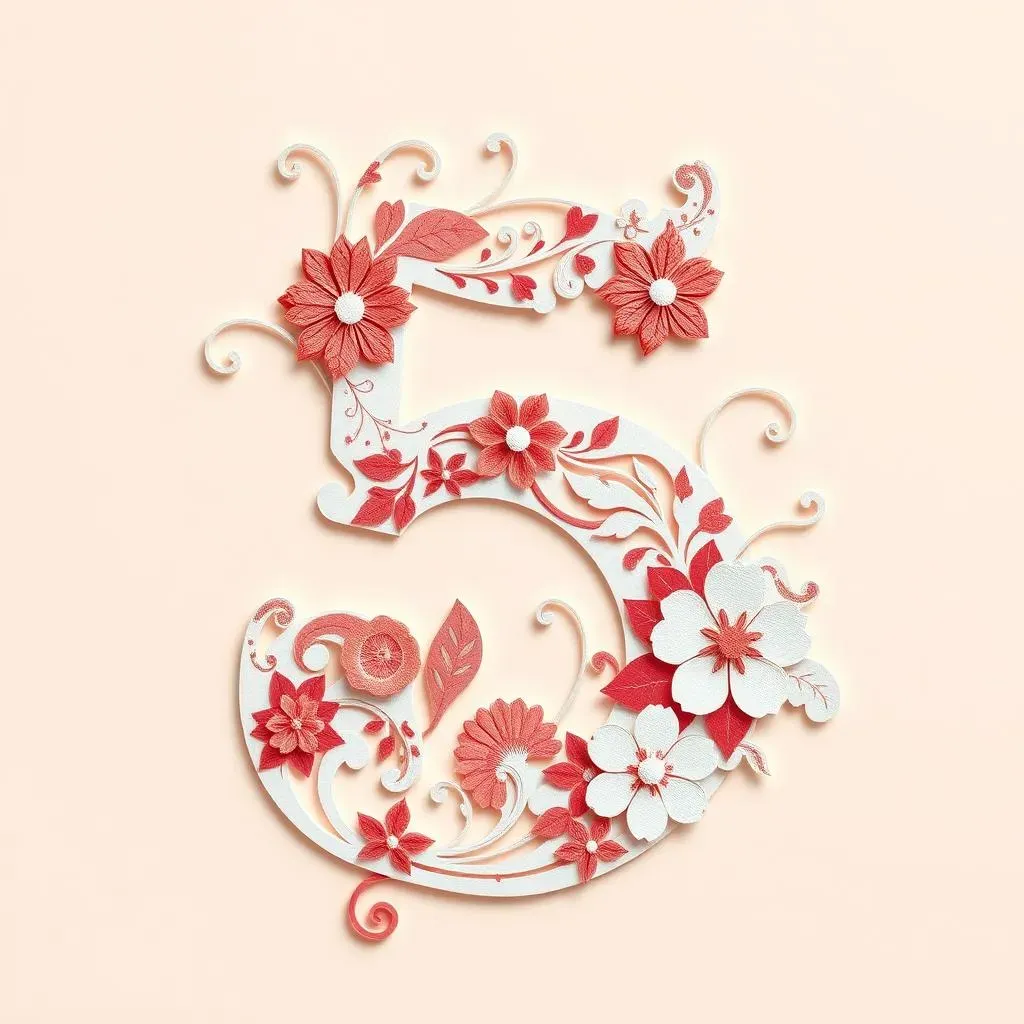
Simple and Bold Designs
For a classic look, try creating bold, simple numbers. Think clean lines and strong shapes. These are perfect for decorations or even creating a number line for a classroom. You can experiment with different fonts or create your own unique style. Consider using contrasting colors for a striking effect. For more inspiration on simple designs, check out our guide on Making a Paper Heart (the techniques translate well to numbers!).
Think about the overall aesthetic. Do you want your numbers to be minimalist and modern? Or perhaps more playful and whimsical? The style of your numbers should complement the overall design you have in mind. For example, bold, blocky numbers might be perfect for a modern geometric design, while more delicate, ornate numbers might be better suited for a vintage or romantic theme. Exploring different paper types can also drastically change the look and feel of your final product. For more details, see our guide on Choosing the Right Paper.
- Bold, blocky numbers
- Clean lines and simple shapes
- Contrasting colors
- Geometric patterns
Intricate and Ornate Designs
If you're feeling adventurous, try creating intricate and ornate numbers. Think swirling patterns, delicate details, and maybe even some embellishments. These numbers can be real showstoppers, perfect for special occasions or unique projects. Remember, patience is key when working on intricate designs – take your time and enjoy the process! For intricate designs, check out our guide on Mastering Paper Cutting Stencils.
Consider incorporating different textures and patterns into your designs. You could add shading or highlighting to give your numbers a three-dimensional effect. Experiment with different cutting techniques to achieve varied lines and textures. Don't be afraid to try something new! And remember, even experienced crafters make mistakes sometimes. That's part of the fun! For more ideas, check out our guide on Mastering Paper Cutting Crafts.
Design Element | Description | Effect |
|---|---|---|
Swirling Patterns | Curved lines and flowing shapes | Elegant, dynamic look |
Delicate Details | Small, intricate cuts | Adds complexity and visual interest |
Embellishments | Adding extra elements (glitter, paint, etc.) | Enhances the overall design |
Themed and Symbolic Designs
Why stick to plain numbers? Infuse your paper cut outs with personality! Create numbers that reflect a specific theme or incorporate symbolic elements. For example, you could design numbers that look like flowers, animals, or even incorporate cultural symbols. This adds a unique touch to your project. For thematic inspiration, explore our guide on Making Ganesha – it showcases the power of thematic paper cutting.
Think about the occasion or project you're creating the numbers for. If it's for a birthday party, you could create numbers that look like balloons, cakes, or presents. For a wedding, you could create numbers that look like hearts, flowers, or doves. The possibilities are endless, so let your creativity soar! To further enhance your understanding of symbolic representations, we recommend reading our article on Chinese Paper Cutting Symbolism.
- Nature-inspired designs (flowers, leaves, animals)
- Geometric patterns and shapes
- Cultural or symbolic elements
- Personalized designs (initials, names)
Using Your Paper Cut Out Numbers in Crafts and Projects
Using Your Paper Cut Out Numbers in Crafts and Projects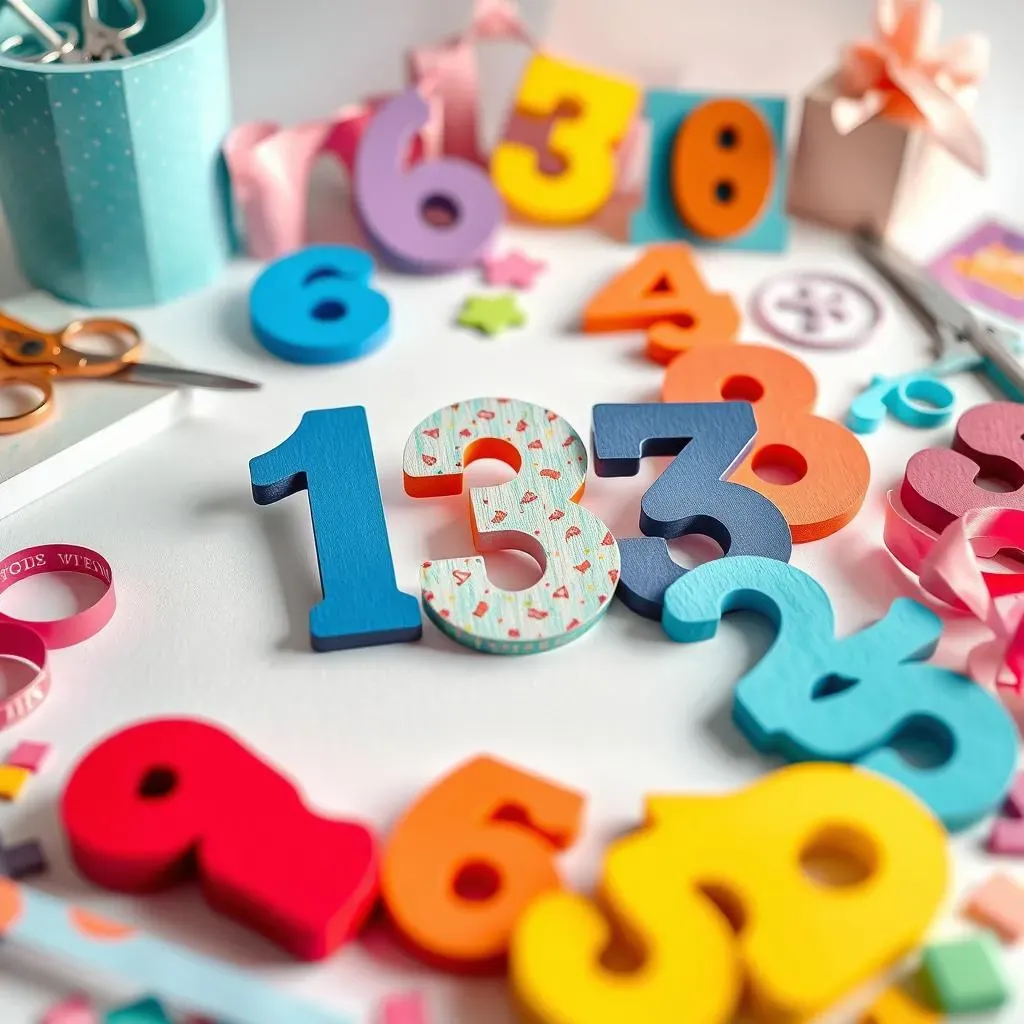
Decorative Accents
Let's get crafty! Your paper cut out numbers are perfect for adding a personalized touch to all sorts of projects. Imagine creating adorable birthday banners, festive garlands, or unique gift tags. The possibilities are endless! Think about using different colors and textures of paper to create a visually interesting and dynamic display. For example, you could use metallic paper for a more sophisticated look, or patterned paper for a more playful feel. Don't be afraid to experiment and see what works best for your projects.
For inspiration on making beautiful frames, check out our guide on Paper Cutting Frames. You can easily incorporate your numbers into these projects for an added decorative element. Remember, the key is to have fun and let your creativity shine through! The more you experiment, the more you'll discover what styles and techniques you enjoy the most.
- Birthday banners
- Festive garlands
- Gift tags
- Scrapbook embellishments
Mixed Media and Beyond
Want to take your paper cut out numbers to the next level? Incorporate them into mixed media projects! Layer them with other materials like fabric scraps, buttons, beads, or even dried flowers. The possibilities are vast and exciting! Think about the overall aesthetic you're aiming for. Do you want a rustic, vintage look? Or perhaps something more modern and minimalist? The materials you choose will greatly influence the final result.
Remember to consider the durability of your materials when creating mixed media projects. If you're using delicate materials, make sure to protect your finished piece by laminating it or sealing it with a clear sealant. For even more creative ideas, check out our guide on Mastering Paper Cutting Crafts. It's full of inspiring ideas to get your creative juices flowing!
Material | Effect | Considerations |
|---|---|---|
Fabric Scraps | Adds texture and warmth | Choose durable fabrics |
Buttons & Beads | Adds visual interest | Securely attach embellishments |
Dried Flowers | Adds a natural touch | Use a sealant to preserve |