Table of Contents
Ever wondered how to add a unique, eye-catching element to your paper crafts? Mastering the art of paper zigzag cutting opens up a world of creative possibilities. From adding playful fringes to party decorations to crafting intricate details for scrapbooking, the zigzag cut is a simple technique with a stunning impact. This article will guide you through everything you need to know to achieve perfect zigzag cuts every time, regardless of your skill level. We'll start with the essential tools and materials, then dive into a step-by-step guide to perfecting your technique. You'll discover how to incorporate these cuts into various art projects, adding texture and dimension to your creations. Finally, we'll explore advanced tips and tricks for creating intricate designs that will truly set your work apart. Get ready to transform ordinary paper into extraordinary art with the magic of paper zigzag cutting!
Essential Tools and Materials for Precise Paper Zigzag Cutting
Essential Tools and Materials for Precise Paper Zigzag Cutting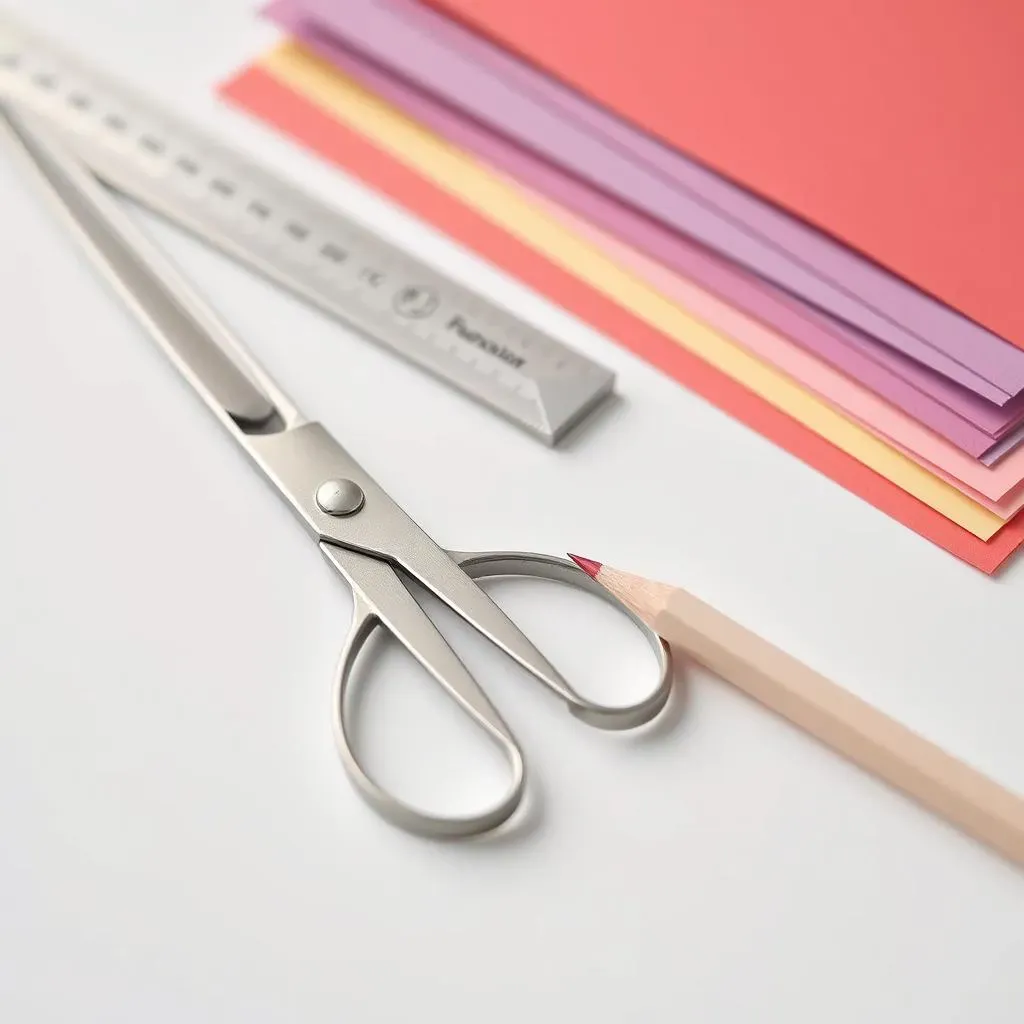
Paper Selection: The Foundation of Your Zigzag Masterpiece
Choosing the right paper is the first step to achieving crisp, clean paper zigzag cuts. The weight and texture of the paper will significantly impact the final result. Lighter papers, like printer paper or origami paper, are easier to cut and fold, making them ideal for beginners or intricate designs. However, they may not hold their shape as well as heavier papers. Cardstock or construction paper provides more stability and durability, perfect for projects that need to withstand handling or display. Experiment with different types to see what works best for your specific project. Also consider the color and finish of the paper to enhance the visual appeal of your zigzag creations. I usually go with cardstock when I'm making decorations, because they need to last!
Cutting Tools: Precision is Key
The tool you use to cut your zigzags is just as important as the paper itself. While regular scissors can work in a pinch, investing in a pair of precision scissors or a craft knife will make a world of difference. Precision scissors have sharp, pointed blades that allow for intricate cuts and clean lines. Craft knives, when used with a cutting mat, offer even greater control and accuracy, especially for complex designs. Don't forget a ruler or straight edge to guide your cuts and ensure uniformity. Always prioritize safety when using sharp tools, and consider using a self-healing cutting mat to protect your work surface. Remember to keep your blades sharp for the cleanest cuts!
To keep your blades sharp, you can sharpen your blades with a blade sharpener or whetstone, or you can take your blades to a professional sharpening service.
Here's a quick guide to choosing the right cutting tool:
Tool | Best For | Pros | Cons |
|---|---|---|---|
Precision Scissors | General zigzag cutting, beginners | Easy to use, good control | Can be tiring for complex designs |
Craft Knife | Intricate designs, experienced users | High precision, clean cuts | Requires more skill, safety concerns |
Pinking Shears | Creating a zigzag edge on fabric or paper | Creates a decorative edge, prevents fraying | Limited to edge cutting |
Marking and Measuring: Accuracy is Your Friend
Before you start cutting, you'll need to mark your zigzag pattern on the paper. A pencil and ruler are essential for creating straight lines and accurate measurements. For more complex designs, consider using a protractor or compass to create precise angles and curves. A light-colored pencil is ideal for marking on darker papers, while a fine-tip marker works well on lighter surfaces. Remember to mark your lines lightly to avoid leaving visible marks after cutting. Taking the time to measure and mark accurately will ensure that your paper zigzag cuts are consistent and visually appealing.
StepbyStep Guide to Perfecting Your Paper Zigzag Cuts
StepbyStep Guide to Perfecting Your Paper Zigzag Cuts
Mastering the Basic Zigzag: A Beginner's Delight
Alright, let's get down to the nitty-gritty of creating those perfect zigzags! First, grab your chosen paper and a pencil. Decide on the length and width of your desired zigzag pattern. A good starting point is about 1 inch for both, but feel free to experiment! Along the edge of your paper, draw two parallel lines that define the width of your zigzag. These lines will act as your cutting guides. Now, here's the fun part: starting at one end, draw a diagonal line from the top line to the bottom line, creating a 'V' shape. Continue this pattern along the entire length of the paper, connecting each 'V' to the next. You should end up with a series of connected zigzags between your two parallel lines.
Once you're happy with your marked pattern, carefully cut along the lines using your precision scissors or craft knife. Remember to keep your fingers away from the blade and move the paper as you cut for a smoother, more controlled line. Take your time and focus on following the lines as closely as possible. After you've finished cutting, gently erase any visible pencil marks. Voila! You've created your first paper zigzag cut!
Advanced Techniques: Taking Your Zigzags to the Next Level
So, you've nailed the basic zigzag? Awesome! Now, let's explore some advanced techniques to add flair and complexity to your designs. One popular variation is the double zigzag, where you create two rows of zigzags nested within each other. This adds depth and visual interest to your cuts. Another technique is varying the width and angle of your zigzags to create a more dynamic and irregular pattern. Try experimenting with different combinations to see what unique effects you can achieve.
For even more intricate designs, consider incorporating curves and other shapes into your zigzag pattern. You can use a compass or stencil to create rounded zigzags or add small circles or triangles within the zigzags themselves. The possibilities are endless! Just remember to take your time, plan your design carefully, and practice on scrap paper before committing to your final piece.
Here are some ideas to spice up your zigzag cuts:
- Vary the angle: Experiment with steeper or shallower angles for different effects.
- Change the width: Make some zigzags wider than others for a more dynamic look.
- Add curves: Incorporate curved lines into your zigzag pattern for a softer feel.
- Combine with other shapes: Mix zigzags with circles, squares, or triangles for unique designs.
Troubleshooting Tips: Avoiding Common Pitfalls
Even with the best techniques, you might encounter some challenges along the way. One common issue is uneven cuts, which can result from using dull scissors or rushing the cutting process. To avoid this, make sure your blades are sharp and take your time to follow the lines carefully. Another problem is tearing the paper, especially when working with delicate materials. To prevent tearing, use a light touch and avoid pulling or tugging on the paper. If you're using a craft knife, make sure your blade is sharp and your cutting mat is clean and smooth. If you do make a mistake, don't worry! Simply patch it up with a small piece of tape or glue, or start over with a fresh sheet of paper. Remember, practice makes perfect!
Here's a quick troubleshooting guide for common zigzag cutting problems:
Problem | Solution |
|---|---|
Uneven cuts | Use sharp scissors, cut slowly and carefully |
Tearing paper | Use a light touch, avoid pulling, use a sharp blade |
Wobbly lines | Use a ruler or straight edge, mark lines clearly |
Inconsistent zigzags | Measure and mark accurately, practice regularly |
Creative Applications: Incorporating Paper Zigzag Cutting into Art Projects
Creative Applications: Incorporating Paper Zigzag Cutting into Art Projects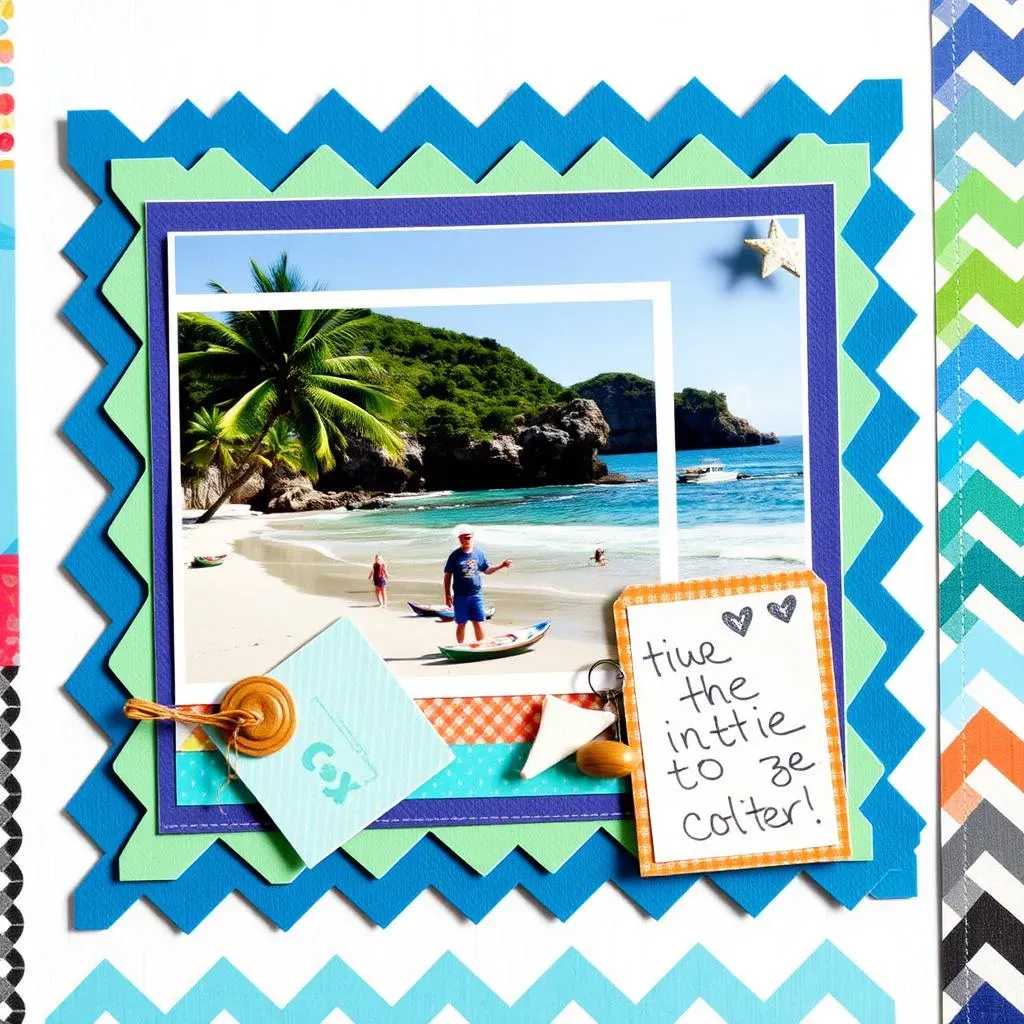
Adding Texture and Dimension to Scrapbooking
One of the most popular uses for paper zigzag cutting is in scrapbooking. Zigzag cuts can add texture, dimension, and visual interest to your pages. Use them to create borders, frames, or embellishments for photos and journaling. Try layering different colors and patterns of zigzag paper to create a unique and eye-catching effect. You can also use zigzag cuts to create pockets or tags for holding small mementos or hidden messages. Whether you're documenting a special event or simply preserving cherished memories, paper zigzag cutting can help you create scrapbook pages that are both beautiful and meaningful. I love using zigzag borders to frame vacation photos – it gives them a fun, whimsical feel!
Here are some ideas for using zigzag cuts in scrapbooking:
- Create a zigzag border around a photo.
- Use zigzag strips to create a background pattern.
- Make zigzag tags for journaling or embellishments.
- Layer different colors of zigzag paper for a dimensional effect.
Creating Unique Greeting Cards and Invitations
Looking to add a personal touch to your greeting cards and invitations? Paper zigzag cutting is a fantastic way to create unique and memorable designs. Use zigzag cuts to create decorative edges, borders, or accents on your cards. Try cutting out shapes like hearts, stars, or flowers from zigzag paper to add a playful touch. You can also use zigzag cuts to create pop-up elements or interactive features on your cards. Whether you're sending a birthday greeting, a thank-you note, or a wedding invitation, paper zigzag cutting can help you create cards that are as special as the occasion itself. I once made a set of thank-you cards with zigzag-cut edges for my friend's baby shower – they were a huge hit!
Here's a table with some card ideas:
Card Type | Zigzag Application | Effect |
|---|---|---|
Birthday Card | Zigzag-cut candles | Festive and playful |
Thank You Card | Zigzag-edged border | Elegant and handmade |
Wedding Invitation | Zigzag-cut floral accents | Romantic and unique |
Advanced Techniques and Tips for Intricate Paper Zigzag Designs
Advanced Techniques and Tips for Intricate Paper Zigzag Designs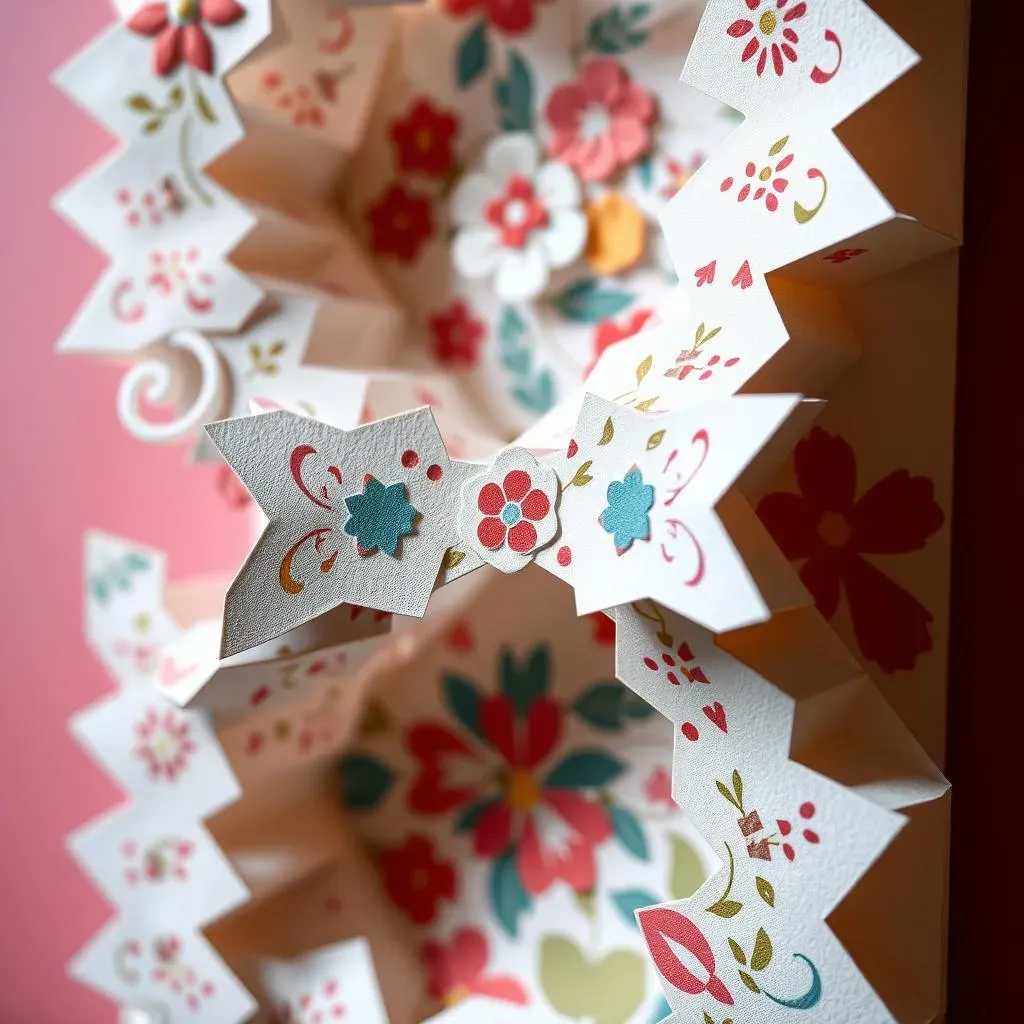
Mastering Complex Patterns
Ready to take your paper zigzag cutting skills to the next level? Let's talk about creating complex patterns that will truly wow. The key here is planning and precision. Before you even pick up your scissors, sketch out your design on paper. Use a ruler, protractor, and compass to create accurate measurements and angles. Think about how different shapes and lines will interact with each other to create a visually stunning effect. Don't be afraid to experiment with different ideas and techniques. Try incorporating geometric shapes, floral motifs, or even abstract designs into your zigzag patterns. The more you experiment, the more creative and unique your designs will become.
Once you're happy with your design, transfer it to your chosen paper using a light-colored pencil or fine-tip marker. Remember to mark your lines lightly to avoid leaving visible marks after cutting. When cutting, take your time and focus on following the lines as closely as possible. Use a sharp blade and a steady hand to ensure clean, precise cuts. If you're working on a particularly complex design, consider breaking it down into smaller, more manageable sections. This will help you stay focused and avoid making mistakes. With practice and patience, you'll be able to create intricate paper zigzag cutting designs that are truly works of art.
The Art of Layering and Dimension
To add even more depth and visual interest to your paper zigzag cutting designs, consider layering different colors, textures, and patterns of paper. Layering can create a sense of depth and dimension, making your designs more eye-catching and dynamic. Try layering different shades of the same color to create a subtle gradient effect. Or, mix and match different colors and patterns to create a bold and vibrant design. You can also experiment with different textures of paper, such as smooth, textured, or metallic papers, to add tactile interest to your designs.
When layering, start with a base layer of solid-colored paper and then add layers of zigzag-cut paper on top. Use adhesive to secure the layers together, making sure to apply it evenly to avoid any bumps or wrinkles. You can also use foam tape or pop dots to create a raised effect, adding even more dimension to your designs. Experiment with different layering techniques to see what works best for your specific project. With a little creativity and experimentation, you can create stunning paper zigzag cutting designs that are full of depth, dimension, and visual appeal.
Conclusion: The Artful Edge of Paper Zigzag Cutting
From simple fringes to complex geometric patterns, paper zigzag cutting offers a versatile technique for adding flair to any paper craft. By mastering the basics, experimenting with different materials, and exploring advanced techniques, you can unlock a world of creative potential. So, grab your scissors and paper, and start cutting your way to stunning designs. The possibilities are as endless as your imagination!