Table of Contents
Ever wanted a unique, eye-catching vase without breaking the bank? Forget mass-produced decor and dive into the world of DIY with a stunning paper cutting vase. This project transforms simple paper into a delicate, sculptural piece, perfect for showcasing your favorite blooms or standing alone as an artistic statement. It's more than just a craft; it's an exercise in patience, precision, and creativity. In this guide, we'll walk you through each step, from gathering your materials to mastering the intricate cuts that bring your vase to life. Whether you're a seasoned crafter or a curious beginner, you'll discover the joy of creating something beautiful with your own two hands. We'll cover selecting the right paper, using essential tools, and the techniques to achieve a flawless finish. Plus, we'll share tips and tricks to avoid common pitfalls and personalize your design. So, grab your supplies and prepare to unleash your inner artist – let's create a paper cutting vase that will impress everyone!
Materials and Tools for Your Paper Cutting Vase
Materials and Tools for Your Paper Cutting Vase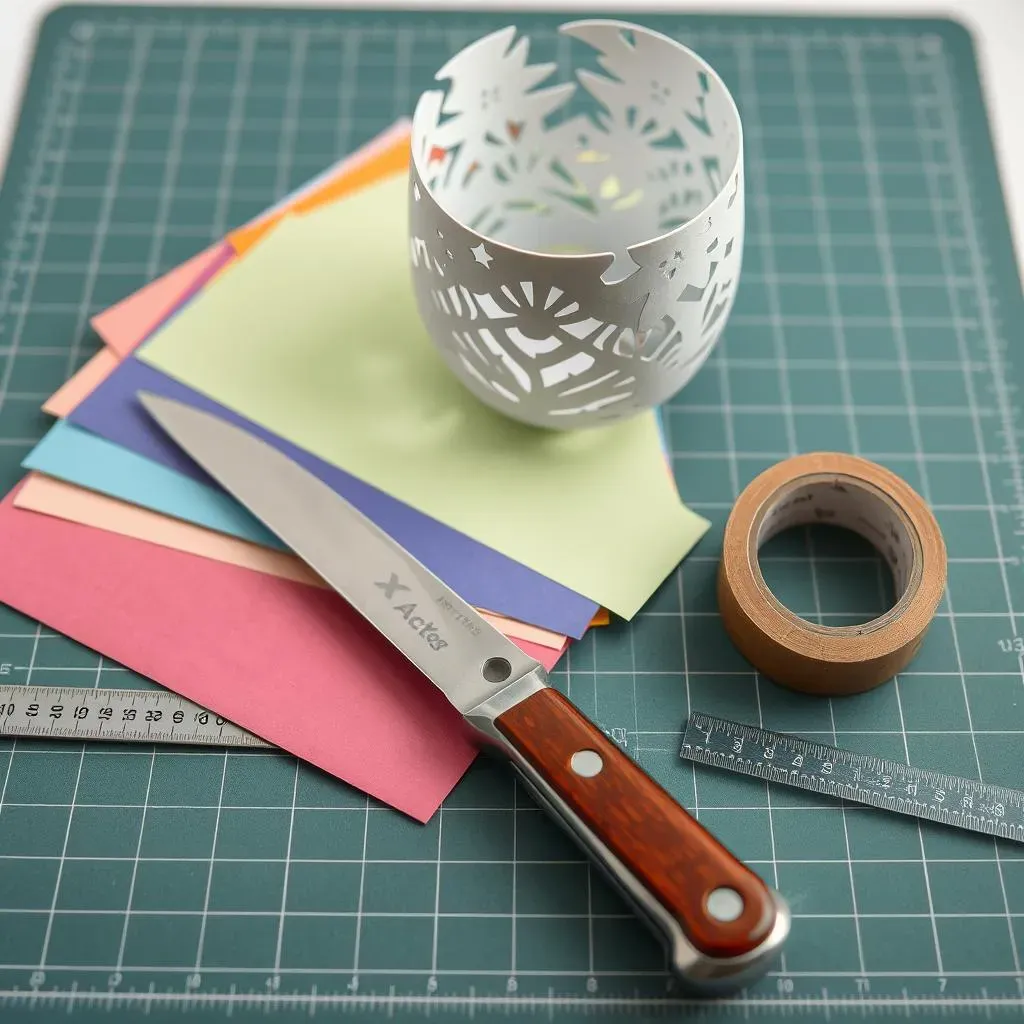
Alright, so you're diving into the world of paper cutting vases? Awesome! First things first, let's talk about what you'll need. Having the right materials and tools is half the battle, trust me. You wouldn't try to paint a masterpiece with a blunt brush, right? Same principle applies here. We're aiming for precision and clean cuts, so quality counts. Think of it like prepping for a good workout – you need the right gear to perform your best and avoid injuries.
Paper is your canvas, so choose wisely. Standard printer paper works in a pinch, but for a sturdier vase, go for something a bit heavier, like cardstock. Not too thick, though, or it'll be a pain to cut. Colors? Patterns? Totally up to you! That's where your personality shines through. Next up, a cutting mat. This is non-negotiable unless you want to destroy your table. Self-healing ones are the best because they last longer. An X-Acto knife is your weapon of choice. Get a sharp one, and please, be careful! Safety first, always. A ruler or straight edge will keep your lines clean and precise. Finally, adhesive. Glue sticks are great for beginners, but for a stronger hold, try double-sided tape or even a thin layer of craft glue.
Tool/Material | Purpose | Recommendation |
|---|---|---|
Paper | Base material for the vase | Medium-weight cardstock (65-80 lb) |
X-Acto Knife | Precision cutting of paper | Sharp blade, comfortable grip |
Cutting Mat | Protects work surface | Self-healing recommended |
Ruler/Straight Edge | Guiding straight cuts | Metal ruler preferred |
Adhesive | Securing the vase's form | Double-sided tape or craft glue |
StepbyStep Guide: Creating Your Unique Paper Vase
StepbyStep Guide: Creating Your Unique Paper Vase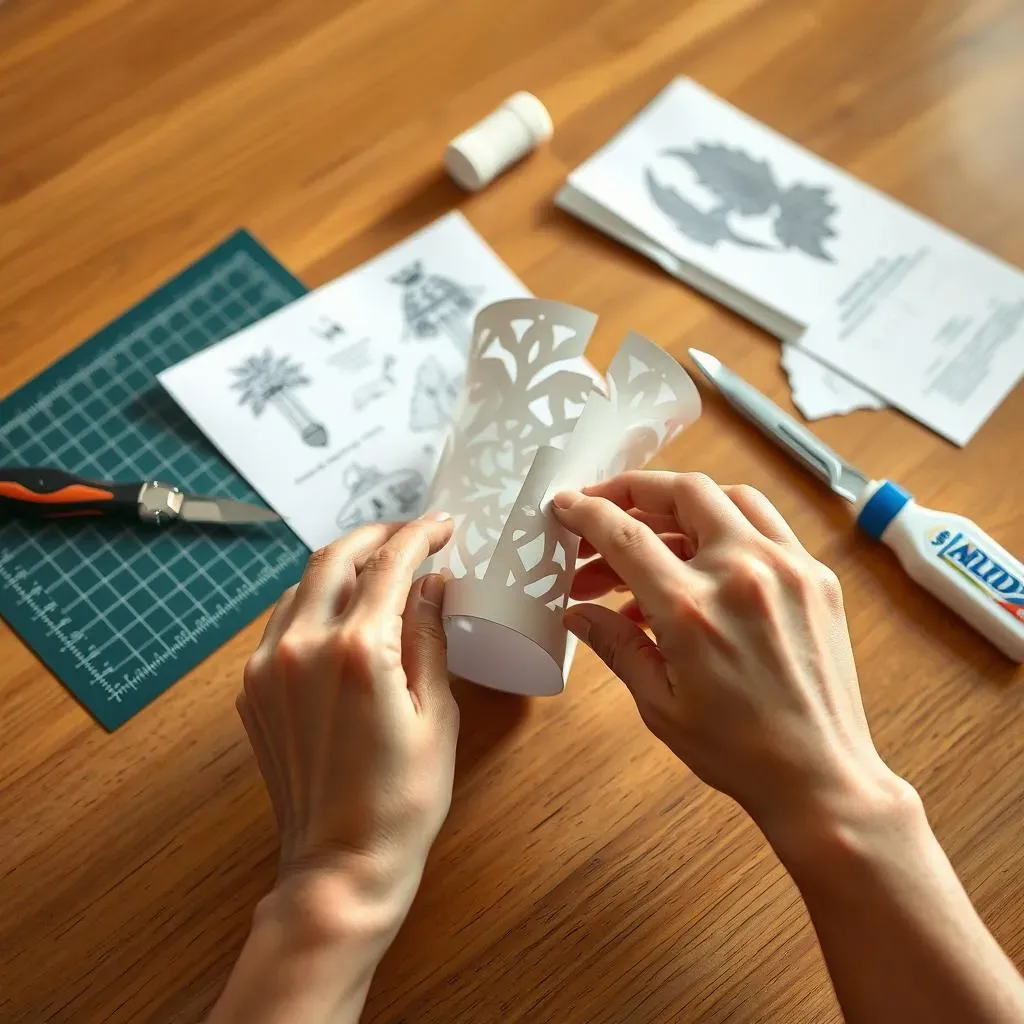
Download and Print the Template
template time! You can find tons of free paper vase templates online. Look for one that suits your style – geometric, floral, abstract, you name it! Once you've found your perfect pattern, download it and print it onto your chosen paper. Remember what we talked about earlier? Medium-weight cardstock is your friend here. Make sure your printer settings are correct to avoid any weird scaling issues. A crisp, clear print is essential for accurate cutting. Think of the template as the blueprint for your masterpiece. If the blueprint is off, the whole building will be wonky, right?
Once printed, let the ink dry completely. Smudging ink is a crafter's worst nightmare! Grab a coffee, let it sit, and come back to it later. Patience, young Padawan. This step is all about setting yourself up for success. A clean, dry template means cleaner cuts and a happier you. Trust me, a little prep goes a long way. Think of it as warming up before a run – it prevents injuries and improves performance.
The Art of the Cut
Alright, this is where the magic happens – and where you need to be extra careful! Place your printed template on your cutting mat. Now, with your super-sharp X-Acto knife, start cutting along the lines. Go slow and steady. There's no need to rush. Precision is key here. Think of it like performing surgery – you want clean, deliberate cuts, not messy hacks. Hold the knife at a slight angle for smoother edges. And remember to change your blade frequently! A dull blade is more dangerous than a sharp one because you'll need to apply more pressure, increasing the risk of slipping.
Start with the inner details first. It's easier to maneuver the paper when it's still intact. As you cut, rotate the paper instead of twisting your wrist. This gives you more control and reduces strain. And for goodness' sake, keep your fingers out of the way! We don't want any accidental self-harm incidents. Take breaks if your hand starts to cramp. This is a marathon, not a sprint. The more intricate the design, the more patience you'll need. But trust me, the end result is worth it. It's like watching a flower bloom – each cut brings you closer to revealing the final beauty.
Assembly and Finishing Touches
Now that you've meticulously cut out your design, it's time to bring your paper cutting vase to life! Carefully peel the template off the cutting mat. Gently flex the paper to loosen any stubborn bits. Now, it's time to shape the vase. Most templates will have designated folding lines or tabs for gluing. Use your ruler to create crisp, clean folds along these lines. A bone folder can be helpful here, but the edge of a ruler works just fine too.
Apply adhesive to the tabs. Double-sided tape is great for a quick and clean bond, but craft glue will give you a stronger, more permanent hold. Press the tabs firmly into place, ensuring a secure connection. Hold for a few seconds to allow the adhesive to set. Once the glue is dry, gently stretch and shape the vase. This is where the magic really happens! The paper will expand and transform into a three-dimensional form. Adjust the shape until you're happy with the overall look. Add any finishing touches, such as reinforcing the base with extra cardstock or embellishing with glitter or paint. And there you have it – your very own, handcrafted paper cutting vase! Time to show off your creation!
Tips and Tricks: Mastering the Art of Paper Cutting Vase
Tips and Tricks: Mastering the Art of Paper Cutting Vase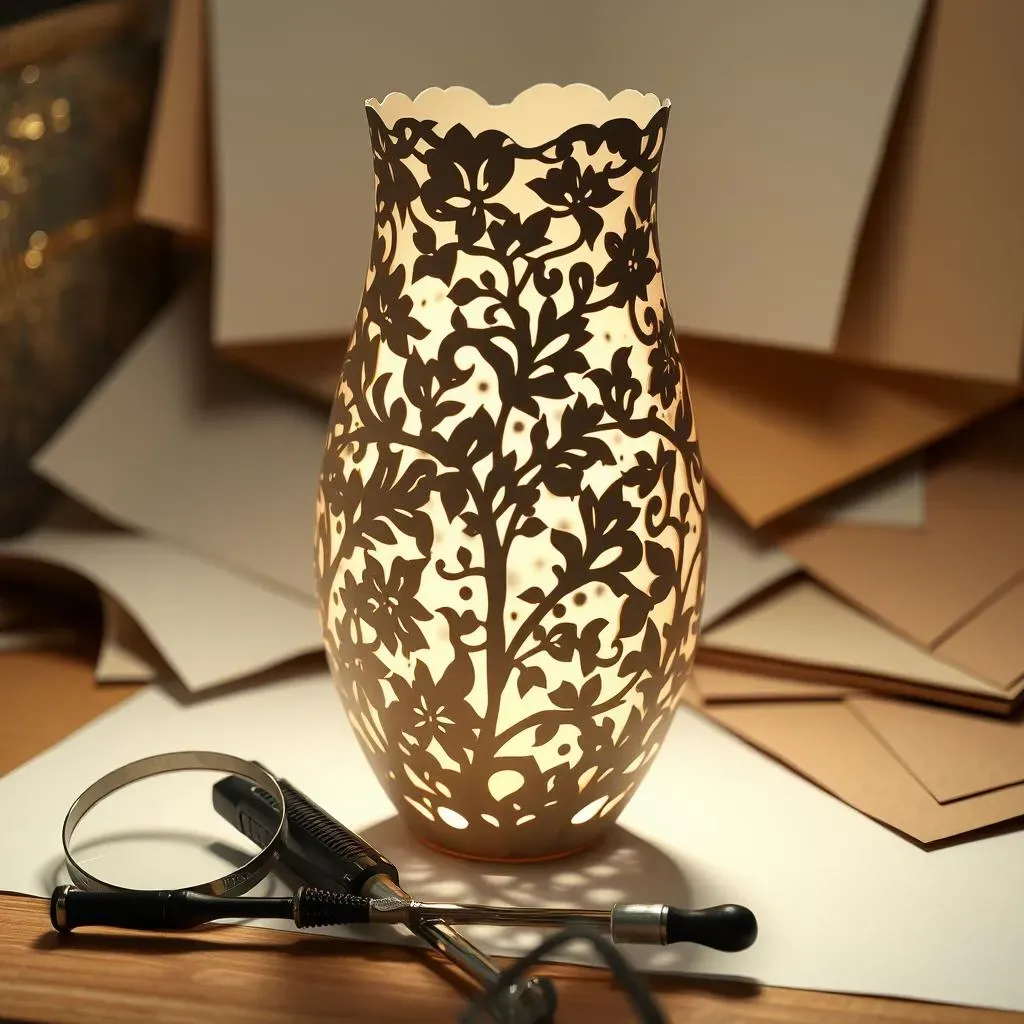
So, you've got the basics down, but want to take your paper cutting vase game to the next level? I get it! It's all about those little tweaks and insights that transform a good project into a *stunning* one. Let's dive into some tips and tricks I've picked up along the way. First off, paper choice is HUGE. Yeah, I mentioned it before, but it's worth repeating. Experiment with different weights and textures. Heavier cardstock will give you a sturdier vase, but it can be trickier to cut intricate designs. Lighter paper is easier to work with, but might not hold its shape as well. Try metallic paper for a touch of glam, or textured paper for added dimension. Don't be afraid to get creative!
Another game-changer? Lighting! When you're cutting, make sure you have good, direct light. It'll help you see those fine lines and avoid mistakes. A magnifying glass can also be a lifesaver, especially for complex patterns. And speaking of patterns, consider the complexity of your design. Start with simpler patterns to build your skills and confidence. As you get more comfortable, you can tackle more intricate designs. Remember, patience is key! Rushing will only lead to mistakes and frustration. Take your time, enjoy the process, and don't be afraid to experiment. It's all about having fun and creating something beautiful!
Tip | Description |
|---|---|
Blade Angle | Hold the X-Acto knife at a consistent, slight angle for smoother cuts. |
Paper Rotation | Rotate the paper instead of your wrist for better control. |
Lighting | Ensure good, direct light to see fine lines clearly. |
Blade Changes | Change blades frequently to avoid tearing and rough edges. |
Practice | Practice on scrap paper to refine your technique before cutting the final design. |
Conclusion: Your Paper Cutting Vase Masterpiece
Congratulations! You've journeyed through the delicate art of crafting your own paper cutting vase. From selecting the perfect paper to executing precise cuts, you've transformed a simple material into a unique and captivating piece of art. This project is a testament to the power of creativity and patience, demonstrating that beauty can be found in the simplest of forms. Display your vase with pride, knowing that it's not just a decorative object, but a reflection of your own skill and imagination. Experiment with different paper types, patterns, and sizes to continue exploring the endless possibilities of paper cutting. Your newfound skills can be applied to a variety of other paper crafts, opening up a world of artistic expression. So, keep creating, keep experimenting, and keep sharing your beautiful creations with the world!