Table of Contents
Ever seen those intricate paper designs and wondered how they're made? It’s not magic, it’s paper cutting, and it’s a craft anyone can pick up with the right tools. I remember my first attempt; it looked more like a paper massacre than art. So, don’t worry if you feel a little clumsy at the start. This article will walk you through everything you need to know about paper cutting materials. We’ll start by going over the basic supplies you will need, from the paper itself to the cutting tools. Choosing the right paper is key, and I'll share my tips on picking the best one for your projects. Then, we'll get into the nitty-gritty of tools like knives, mats, and rulers. Finally, we'll put it all together with a simple tree paper cutting tutorial. By the end of this, you'll be ready to start your own paper cutting adventure, and maybe make something that doesn't look like it was attacked by a toddler.
Essential Paper Cutting Materials for Beginners
Essential Paper Cutting Materials for Beginners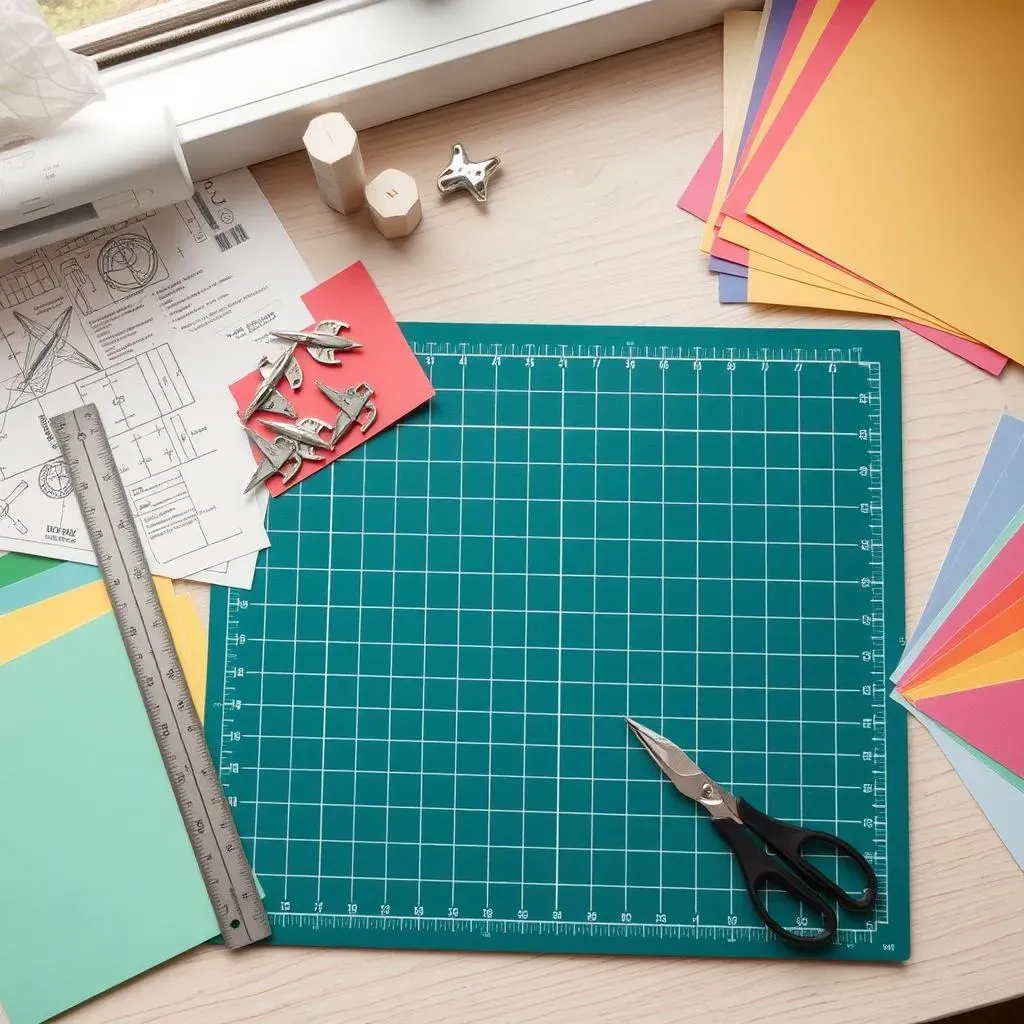
Okay, so you're itching to try paper cutting? Awesome! Before you start hacking away at any old sheet, let's talk about the must-have paper cutting materials. It's not just about grabbing any paper and a kitchen knife, trust me on this one. You’ll need a few key items to make the process smoother and less likely to result in a paper-cutting disaster. We're talking about the essentials that'll set you up for success and make your crafting experience enjoyable. Think of it like gathering your ingredients before baking a cake – you can't skip the flour and expect a masterpiece, right? Same goes for this, get the right tools, and the rest will follow.
First up, you absolutely need a good cutting mat. This isn't just some fancy accessory; it protects your table and keeps your knife from going rogue. Next, you'll need a sharp craft knife with replacement blades. Dull blades are your enemy and can lead to ragged edges and frustration. And don't forget a metal ruler, this is not for hitting people with; it's for making straight cuts. You'll also need tracing paper, which is super handy for transferring designs. And of course, paper! We will get into the details about the paper in the next section, but you should have some on hand.
Material | Why You Need It |
|---|---|
Cutting Mat | Protects your work surface, prevents slipping. |
Craft Knife | Provides precise cuts, use sharp blades. |
Metal Ruler | Ensures straight and accurate lines. |
Tracing Paper | Transfers designs easily. |
Choosing the Right Paper for Paper Cutting
Choosing the Right Paper for Paper Cutting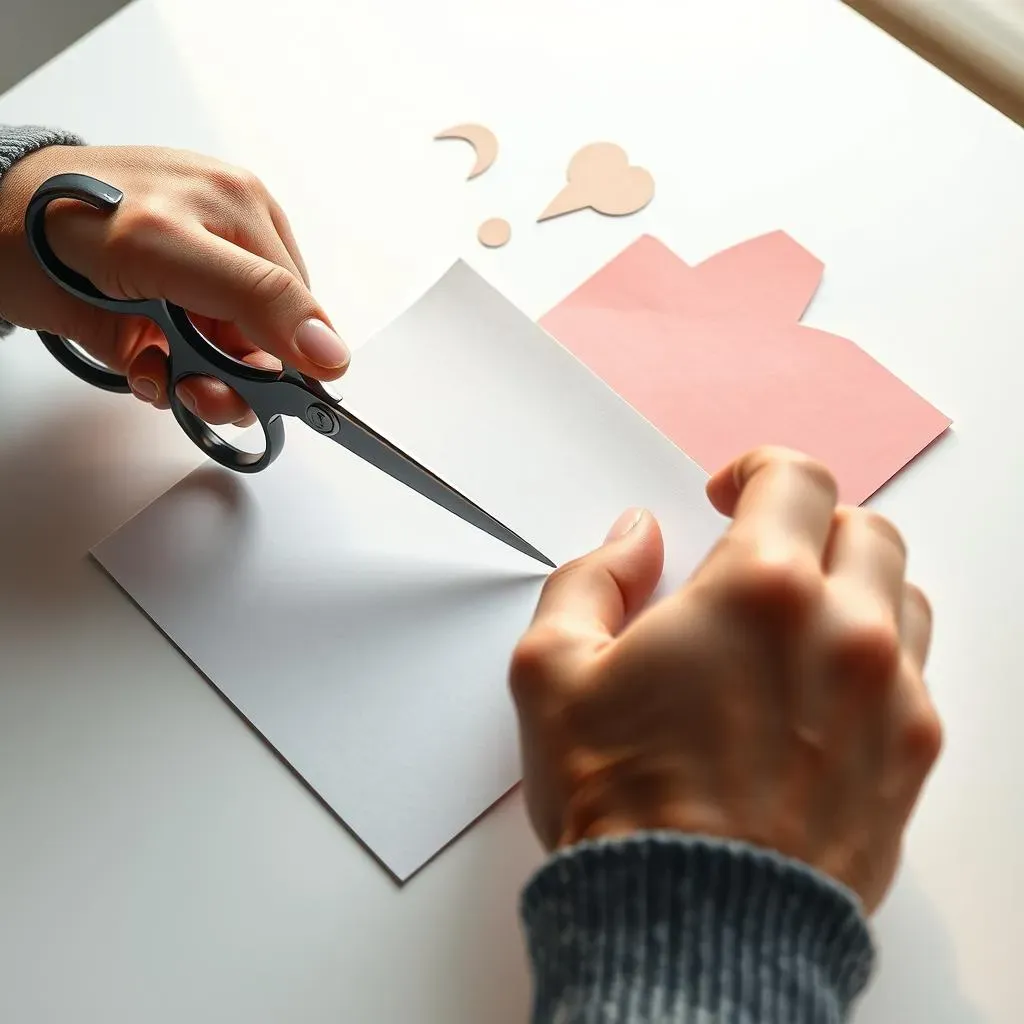
The Weight of Your Decision
Alright, let's talk paper. Not all paper is created equal, especially when it comes to paper cutting. You can’t just grab any old notebook sheet and hope for the best. The weight, or thickness, of the paper is super important. For paper cutting, you're going to want something that's sturdy enough to hold its shape but also thin enough to cut through easily. Think of it like Goldilocks and the three bears, not too thick, not too thin, it has to be just right. If the paper is too thin, it'll tear super easily, and you'll end up with a frustrating mess. Too thick and your knife will struggle, leading to jagged cuts and a sore hand.
I've found that paper around 160 GSM (grams per square meter) is usually the sweet spot. This weight provides a good balance between being easy to cut and strong enough to hold up to intricate designs. It's like finding that perfect pair of jeans, comfortable and durable. Using this paper weight means you can make those nice sharp cuts without tearing the paper. Trust me, using the wrong paper is like trying to run a marathon in flip-flops, it's not going to end well.
Smoothness and Texture
Besides the weight, the texture of the paper is crucial. You want a paper that’s smooth, not bumpy. Textured paper can make it harder for your knife to glide smoothly, and it can cause the blade to catch and tear. It's like trying to drive on a bumpy road, it's going to be a rough ride. Smooth paper allows your knife to move effortlessly, creating clean and precise cuts. Think of it like ice skating, you want a smooth surface for your blades to glide on. The smoother the paper, the cleaner the cut, and the happier you will be.
Also, consider the color of the paper. While this is more of a personal choice, it can affect how your final design looks. Dark colors can create a dramatic contrast, while lighter colors can give a more subtle effect. I once used neon pink paper for a friend's birthday card, it was definitely memorable, maybe a bit too memorable. So, experiment and see what you like, but start with something smooth and of the right weight.
Paper Characteristic | Why It Matters |
|---|---|
Weight (GSM) | Determines sturdiness and ease of cutting. |
Texture | Affects smoothness of cuts; smooth is best. |
Color | Impacts the final look and contrast of the design. |
Paper Types to Try
Now that you know what to look for, let's discuss some specific types of paper that work well for paper cutting. Cardstock is a popular option because it’s sturdy and comes in a variety of colors. It’s like the reliable friend you can always count on. Another great choice is Bristol paper, which is super smooth and great for intricate designs. It’s the smooth operator of the paper world. You could also experiment with specialty papers, like metallic or handmade papers, but make sure they are smooth enough and not too thick. It's like trying new ingredients in a recipe, sometimes it's a great discovery, sometimes not so much.
If you are just starting out, I recommend sticking with cardstock or Bristol paper. These are easy to find and will give you a good feel for the craft. Once you get more comfortable, you can start exploring other options. Remember, the goal is to have fun and create something beautiful. It's not about perfection, it's about the process and the journey. So, grab your paper, grab your knife, and get cutting. You've got this!
Paper Cutting Tools: Knives, Mats, and Rulers
Paper Cutting Tools: Knives, Mats, and Rulers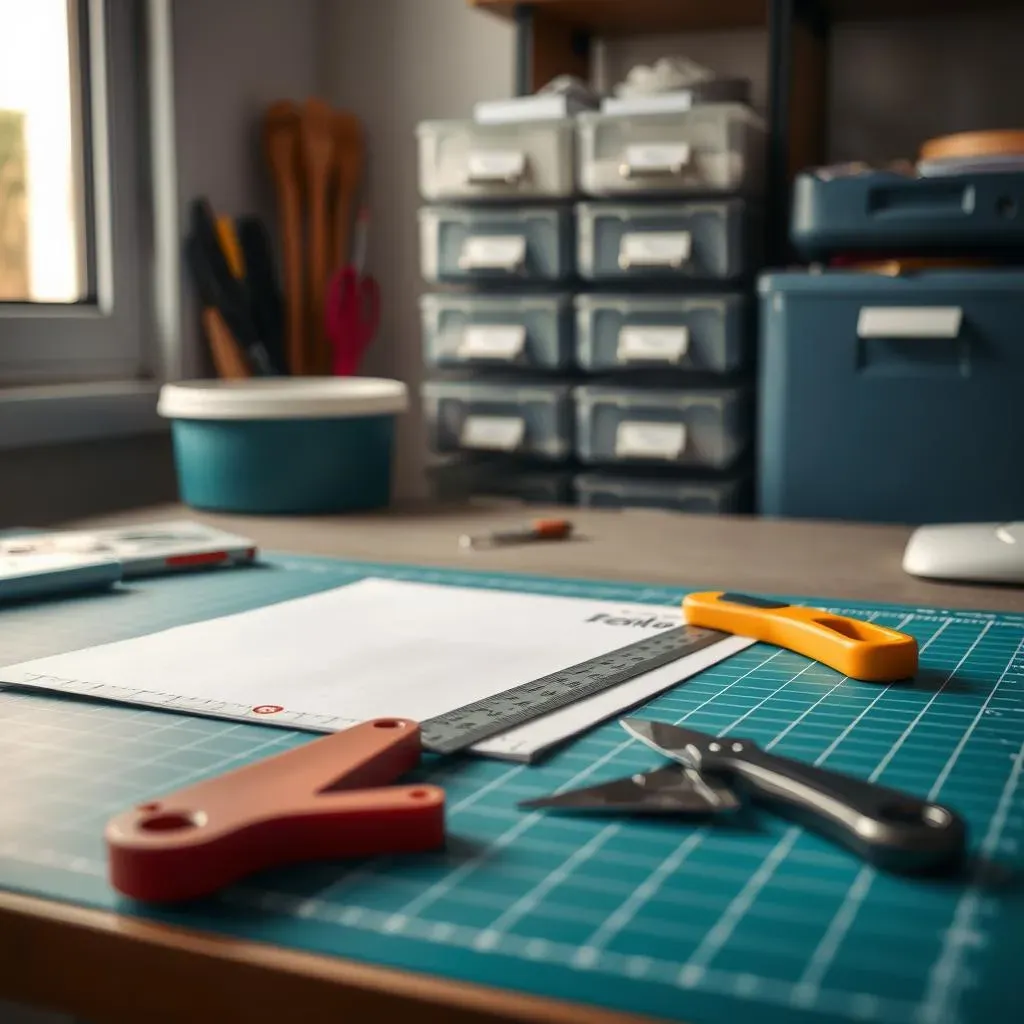
Alright, let's get to the fun part: the tools! You wouldn't try to paint a masterpiece with a twig, right? Same goes for paper cutting, you need the right gear. We're talking about the holy trinity of paper cutting: knives, mats, and rulers. These aren't just random items; they're your trusty sidekicks that will make or break your paper cutting experience. I remember when I first started, I tried using a regular utility knife, it was a disaster, the cuts were jagged and uneven, it was like a shark attack on paper. So let’s save you from that and go over the best tools for the job.
First, let's talk knives. A good craft knife is like an extension of your hand. You're going to want one with a slim handle and replaceable blades. Forget those dull blades, they're the enemy. A sharp blade gives you clean and precise cuts, it's like slicing through butter, but with paper. Always make sure to keep a pack of replacement blades handy, because nothing is worse than having to stop in the middle of a project just because your blade is dull. And please, be careful! These knives are sharp and are not toys.
Tool | Why It's Important |
|---|---|
Craft Knife | Provides precise and clean cuts. |
Replacement Blades | Ensures your knife is always sharp. |
Next up, the cutting mat. This is not just a fancy placemat, it’s a lifesaver for your work surface. A self-healing cutting mat is your best bet. It protects your table from getting all sliced up and also keeps your paper from slipping around. It's like having a safety net for your project. I once tried cutting directly on my wooden desk and ended up with a bunch of tiny cuts, not a good look. So, get a mat, it’s worth it. It also gives you a nice flat surface to work on, which is especially important when you are working on those intricate designs.
And last but definitely not least, the metal ruler. This isn’t just for measuring; it's your guide for making those straight cuts. A metal ruler is much better than a plastic one because the knife can slip on plastic and cut into it, a metal one can withstand the knife and will not budge. It also helps you keep your lines straight. I've tried using a flimsy plastic ruler, and it was a wobbly mess, the lines were not clean and it was a total disaster. So, get a sturdy metal ruler, it's a must-have.
With these tools in your arsenal, you'll be ready to take on any paper cutting project. It’s all about having the right tools that can make the job easier and more enjoyable.
- Self-healing cutting mat: Protects surfaces, prevents slipping.
- Metal ruler: Guides straight, accurate cuts.
StepbyStep Tree Paper Cutting with Recommended Materials
StepbyStep Tree Paper Cutting with Recommended Materials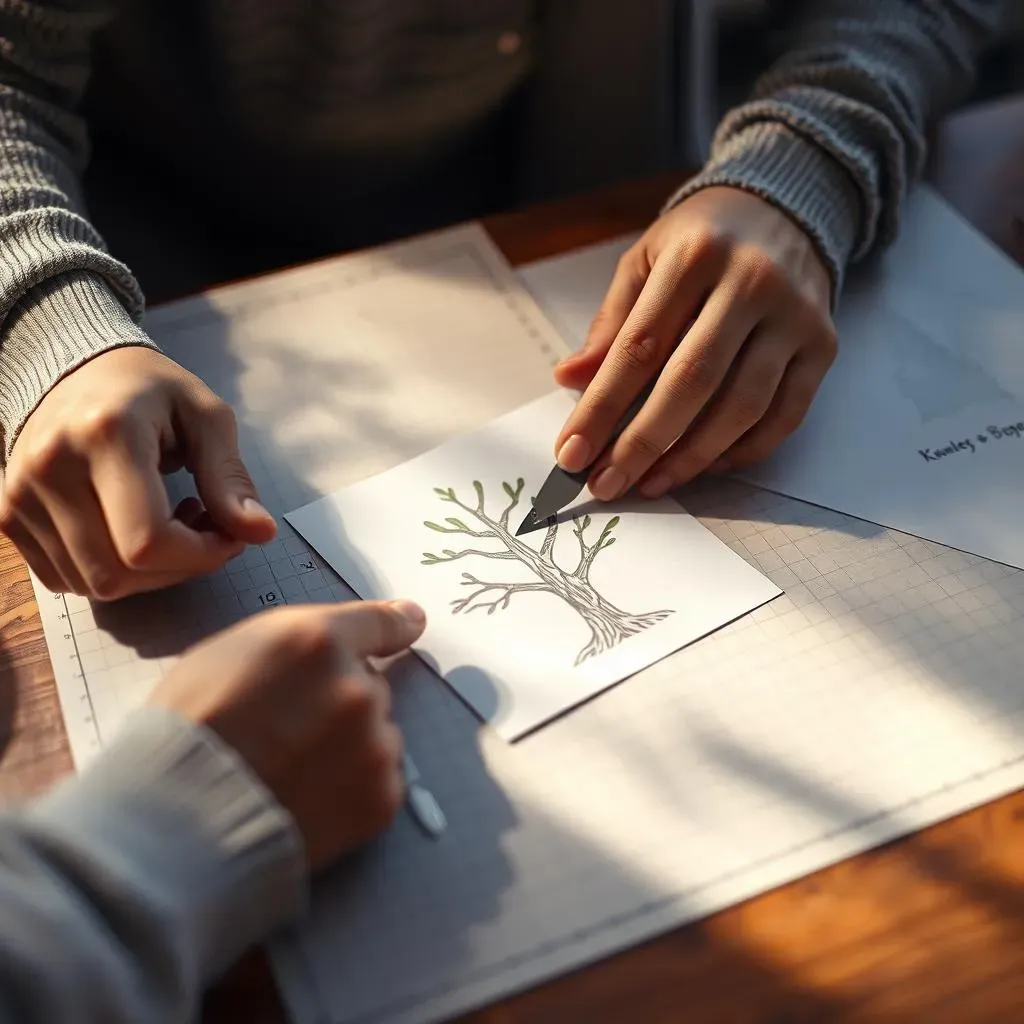
Getting Started with Your Tree Design
Okay, so you've got your paper cutting materials ready, now let's make some art! We're going to create a simple tree design, a classic choice that’s great for beginners. You can either find a template online or draw your own. I like to draw my own, it’s like a little doodle therapy session. If you're drawing, keep it simple, think basic tree shapes with a trunk, branches, and maybe some leaves. Remember, the simpler the design, the easier it will be to cut. If you are using a template, just print it out. Once you have your design, place your tracing paper over it and trace the outline. This is where that tracing paper comes in handy, it saves you from drawing directly on your nice paper.
Now, take your traced design and place it on top of your chosen paper. I like to use a bit of tape to secure it, just a couple of small pieces on the corners will do the trick. You don’t want it slipping around while you’re cutting. This step is like preparing your canvas, you want to make sure everything is in place before you start painting. Double-check that your paper is lying flat on your cutting mat, that way you will avoid any accidental cuts on the table. And make sure you have your sharp craft knife at the ready. Are you ready to begin?
Step | Action |
|---|---|
1 | Find or draw a simple tree design. |
2 | Trace the design onto tracing paper. |
3 | Secure the traced design on top of your chosen paper using tape. |
Cutting Your Tree Design
Alright, here comes the cutting part, the moment of truth. Start by cutting out the smaller areas first, like the spaces between the branches or the inside of the leaves. This prevents any accidental tears in the bigger areas later on. Always move the knife towards you, with light pressure. Do not try to cut it all in one go, it’s better to do multiple light cuts than one hard cut, that might slip and ruin the entire thing. It’s like peeling an orange, you don't want to use too much force and squirt juice everywhere.
As you cut, make sure your knife is following the lines of your design. Use your non-cutting hand to hold the paper steady. Take your time, and don't rush. It's like meditation, focusing on the lines and your knife moving slowly, and precisely. If you make a mistake, don’t panic, you can usually fix it or just incorporate it into the design. Once you've cut out all the small areas, you can move on to cutting the outer edges of your tree. And there you have it, your very own paper cut tree! Now you can use this same techniques to cut out any other design you want.
Remember, practice makes perfect, so don’t be discouraged if it doesn’t look amazing on your first try. Keep practicing, and you’ll be cutting like a pro in no time. And if you need more inspiration, there are tons of resources online. The possibilities are endless, so go explore, have fun, and cut away.
Wrapping Up Your Paper Cutting Journey
So, there you have it, a beginner's peek into the world of paper cutting. We’ve covered everything from the essential paper cutting materials you'll need, to choosing the right paper and tools, and even tried our hand at a tree design. Remember, practice makes progress, and every little snip is a step closer to creating something amazing. Don't be afraid to experiment, try different papers, and most importantly, have fun. The possibilities are as endless as your imagination, so grab your knife, mat, and paper, and start cutting!