Table of Contents
Ever wondered how to create those cute, grassy decorations you see in classrooms or craft projects? Well, it's easier than you think! We're diving into the world of "paper cutting grass," a simple yet surprisingly versatile craft that anyone can do. Forget fancy tools or complicated steps; all you need are some basic supplies and a little patience. In this article, I'll walk you through the process step-by-step, so you can make your own paper grass in no time. We'll start with the basics, learning what materials you need and how to cut the paper just right. Then, I'll show you some cool ways to use your paper grass, from classroom displays to fun party decorations. I'll tell you my experiences with paper cutting, and how a simple craft can turn into a fun project. Get ready to unleash your creativity, and let’s transform some plain paper into a vibrant field of grass!
Getting Started with Paper Cutting Grass
Getting Started with Paper Cutting Grass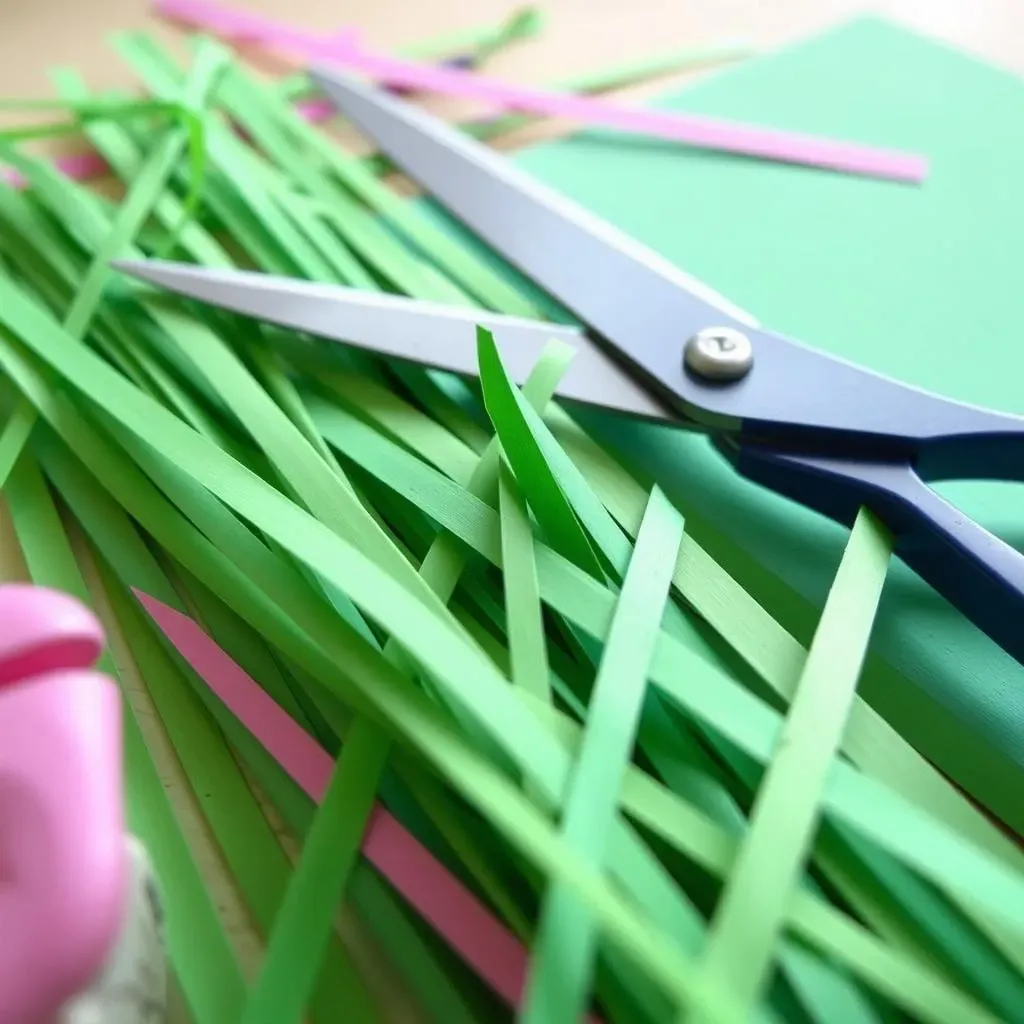
Gathering Your Supplies
Okay, before we get our hands grassy, let's talk about the stuff you'll need. It's super simple, I promise. First, you'll obviously need paper. Any kind will do, but I like using green construction paper, it just feels right. You'll also need a good pair of scissors. I've used everything from tiny craft scissors to my mom's big kitchen shears. Just be careful! And that's it! Seriously, that's all you need for paper cutting grass. No fancy equipment required. It's like the easiest craft ever, which is why I love it.
I remember when I first tried this, I was using some old, flimsy notebook paper, and it was a complete mess. The paper kept tearing, and the cuts looked like a toddler attacked it with a pair of safety scissors. Lesson learned: the type of paper matters.
Preparing Your Paper
Now that you have your paper and scissors, let’s get cutting! I usually start by folding my paper in half, long ways, like making a hotdog shape. This helps make the cutting part easier, and you get more grass blades in one go. If you're using a smaller piece of paper you don't have to do it, but I find it helps. It’s a little like prepping for a big art project, but way less intimidating. Think of it as warming up before a race.
The fold doesn’t have to be perfect; we’re making grass, not rocket ships. I've seen people get stressed about making the perfect fold, but honestly, the slightly wonky ones add a bit of character. It gives it a more natural, organic look.
Supply | Why You Need It |
|---|---|
Paper (Green Construction) | The base of your grass |
Scissors | For cutting the paper |
Basic Cutting Techniques
Okay, this is where the fun begins! With your folded paper, start making cuts along the open edge. Don't cut all the way to the folded line, though! You want to leave a little space at the top, so the grass stays together. I like to make my cuts about half an inch apart, but you can make them closer or farther apart if you want different textures. Just keep cutting all the way across the paper. This is the most important part. This is where the magic happens.
When I first started, my cuts were all over the place. Some were super thick, and some were really thin. It looked like a bad haircut. But the more I practiced, the better they looked. Just keep going and don’t give up!
StepbyStep Guide to Cutting Paper Grass
StepbyStep Guide to Cutting Paper Grass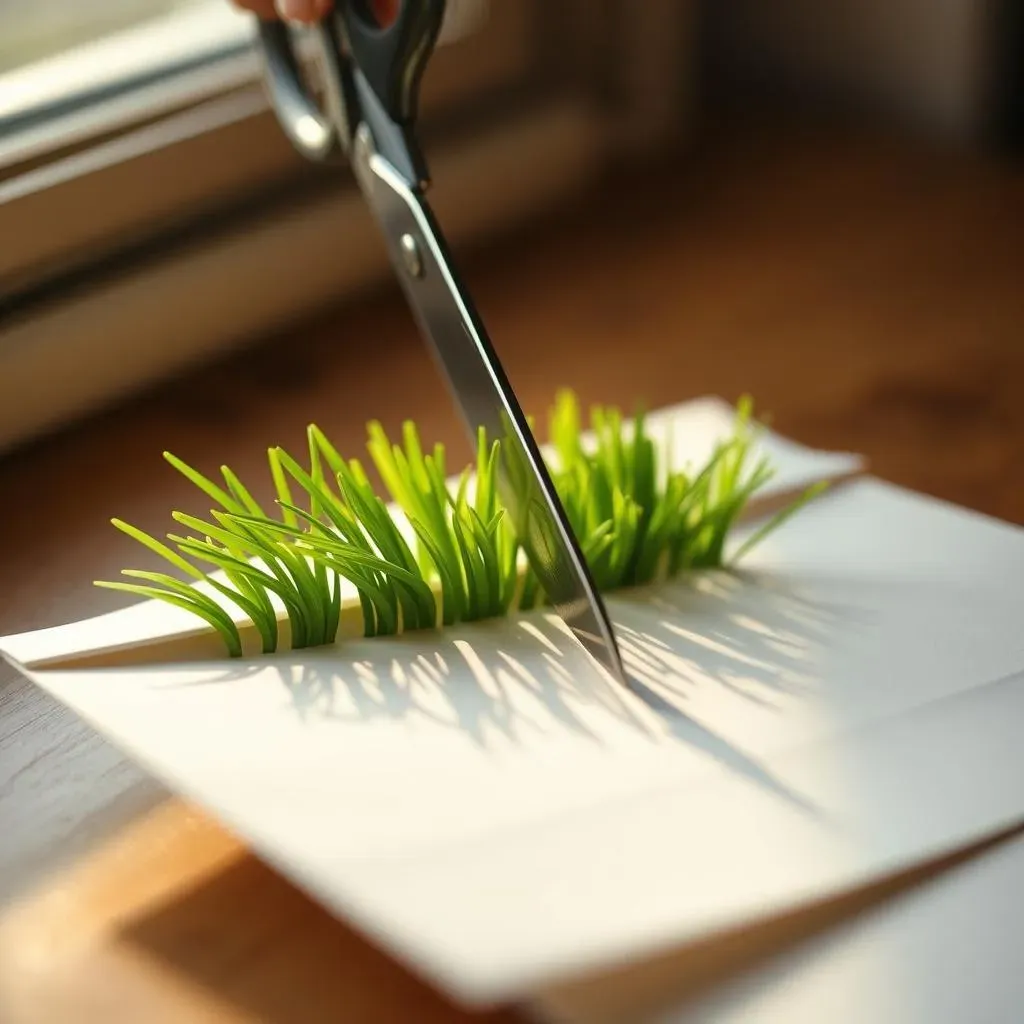
Making the Fringe
Alright, you've got your paper folded and ready, now comes the fun part: making the fringe! This is where we start to see the grass take shape. Remember those cuts we talked about earlier? Now we're actually going to make them. Start at the open edge of your folded paper and make a series of cuts going up towards the folded edge, but not all the way. You want to leave about an inch or so of uncut paper at the top. Think of it like cutting fringe on a piece of fabric, but way simpler. The closer together your cuts, the finer your grass will be. I tend to go for about a half-inch spacing, but you do you.
I always get a little mesmerized by this part. It's like watching the paper transform into something else. And honestly, don't worry if your cuts aren't perfectly straight or evenly spaced. Real grass isn't perfect, so why should our paper grass be? The slight imperfections are what make each piece unique. It's all part of the charm, like a tiny, grassy snowflake.
Unfolding and Fluffing
Once you’ve finished making all your cuts, carefully unfold your paper. Boom! You’ve got a patch of paper grass. Now, it might look a little flat at first, but don’t worry, we can fix that. I like to gently run my fingers through the grass to fluff it up and give it some dimension. You can also use your fingers to curl the blades of grass a bit, making it look more realistic. It’s like giving your grass a little hair salon treatment. Fluffing is key to making it look full and lively.
I remember the first time I did this, I was so excited to see it all unfold. It was like magic, watching the flat paper transform into these little blades of grass. It's a simple thing, but it's oddly satisfying. And the best part is, you can adjust the fluffiness to your liking. Want thick, bushy grass? Fluff it up a lot! Want something more subtle? Just a light touch will do. It's all up to you.
Step | Action | Tip |
|---|---|---|
1 | Make Fringe Cuts | Don't cut all the way to the fold |
2 | Unfold the Paper | Do it gently to avoid tearing |
3 | Fluff the Grass | Use your fingers to add dimension |
Creative Ways to Use Your Paper Cutting Grass
Creative Ways to Use Your Paper Cutting Grass
Decorating and Displaying
Okay, so you've got a pile of fluffy paper grass, now what? The fun part is figuring out how to use it! I've found that it's incredibly versatile. You can use it to decorate bulletin boards, making them look like a mini meadow. I remember using it for a school project about the environment, and it made our display look so much better. You can also use it as filler in gift baskets, giving them a natural, earthy vibe. It's a great way to add texture and color to any project. You can even make little paper animals and put them in the paper grass for a cute scene.
One time, I used paper grass to decorate for a kid's birthday party. We made a "grass" table runner, and it was a huge hit. The kids loved touching it, and it added a playful touch to the whole party. It's amazing how something so simple can make such a big impact. You could also use it to create a backdrop for a school play or even just to add a little greenery to your desk.
Crafts and Projects
Beyond just decorating, paper grass is awesome for all sorts of creative projects. For example, kids can use it in their art projects to create scenes of nature. Think of a paper sun, a blue sky, and green paper grass below. It’s an easy way to make artwork pop. It works great for collages, too. You can cut different lengths and colors of grass to create a textured effect. It’s a fun way to teach kids about different textures and colors.
I've also seen people use it to make miniature landscapes for dioramas. They create a base with cardboard, add some paper trees and animals, and then use the paper grass to fill in the ground. It's like creating a tiny world. It's amazing how a simple thing like paper grass can spark so much creativity. You can even use it to make cards. Just glue it on and you have a very cool texture. You can even dye the paper grass with some water color to make it look more unique.
- Use as a filler for gift baskets.
- Create a table runner for parties.
- Incorporate into art projects and collages.
- Make miniature landscapes for dioramas.
- Use as a decorative element on cards.
Educational Purposes
Paper grass isn't just for fun; it can also be a great educational tool. Teachers can use it in the classroom to teach kids about nature and different ecosystems. It’s a great way to make learning more interactive. You can use it to create a model of a grassland or a garden. This is a great way to make the lesson more hands-on and visual for students.
I remember using paper grass in a science class to represent different types of vegetation. We learned about different types of plants that grow in grasslands, and it helped me understand the concept better. It made the lesson more engaging and memorable. It's a simple material, but it can be a powerful learning tool. You can even use it to teach kids about different shades of green.
Use | Educational Benefit |
|---|---|
Ecosystem Models | Helps visualize different environments. |
Plant Studies | Demonstrates different types of vegetation. |
Color and Texture Lessons | Teaches about different shades and textures. |