Table of Contents
Ever wondered how those intricate paper designs are made? It's not magic, it's paper cutting! And it's way easier than you think. This article is your guide to mastering the art of creating different shapes of paper cutting. We'll start with the must-have tools, because let's be honest, trying to cut paper with dull scissors is a recipe for disaster. Then, we'll move onto basic cutting methods, showing you how to make clean lines and curves. Ready for a challenge? We’ll explore more complex designs, and I’ll share some tips to avoid common mistakes, like accidentally slicing your finger (been there, done that!). Finally, we will cover a section on what to do when things go wrong. Stick with me, and you'll be crafting amazing paper art in no time. Think of this as your paper cutting adventure, where we will tackle different shapes together. So, grab your scalpel, and let's get started!
Essential Tools for Different Shapes of Paper Cutting
Essential Tools for Different Shapes of Paper Cutting 
The Cutting Essentials
Okay, so you wanna get into some serious paper cutting? First things first, you can't just grab any old scissors and expect magic. You'll need a few key tools, and trust me, having the right gear makes all the difference. Think of it like cooking, you need a good knife, right? Same deal here. We are not talking about your kids safety scissor, that would be disastrous.
The star of the show is a good scalpel, also known as a craft knife. Get one with a sharp point and a flexible blade; it'll make cutting those curves and tiny details so much easier. And for the love of all that is paper, grab a spare blade or two. Nothing is worse than having your blade snap mid-cut. A self-healing cutting mat is also crucial, trust me, you don't want to ruin your table, or your mom's table.
Other Helpful Tools
Now, while the scalpel and cutting mat are the rockstars, there are some other tools that can make your life a whole lot easier. A good quality card stock or paper is a must, the type of paper you are using is critical. Think of it like the canvas for your masterpiece, you want it to be good quality. And while we are at it, grab some glue stick for sticking the paper to the card stock. Don't forget some masking tape for those times when you need to hold things in place, or fix mistakes. Finally, you'll need some images to cut out; this could be anything from a simple shape to a complex design.
I remember the first time I tried paper cutting, I used regular printer paper and a dull kitchen knife (don’t judge). Let's just say it wasn't pretty. My edges were jagged, my cuts were wonky, and I nearly gave up before I even started. So, take it from someone who has been there, having the right tools is half the battle.
Tool | Why You Need It | My Recommendation |
|---|---|---|
Scalpel/Craft Knife | For precise cuts | Get one with a sharp, flexible blade |
Self-Healing Cutting Mat | Protects your work surface | A must-have to avoid table damage |
Good Quality Card/Paper | Provides a good base for cutting | Choose based on thickness and texture |
Glue Stick | For sticking the design to the card | Any brand will do, just make sure it's not too wet |
Masking Tape | For securing the design or fixing mistakes | Low-tack tape is best |
Basic Techniques for Cutting Different Shapes
Basic Techniques for Cutting Different Shapes 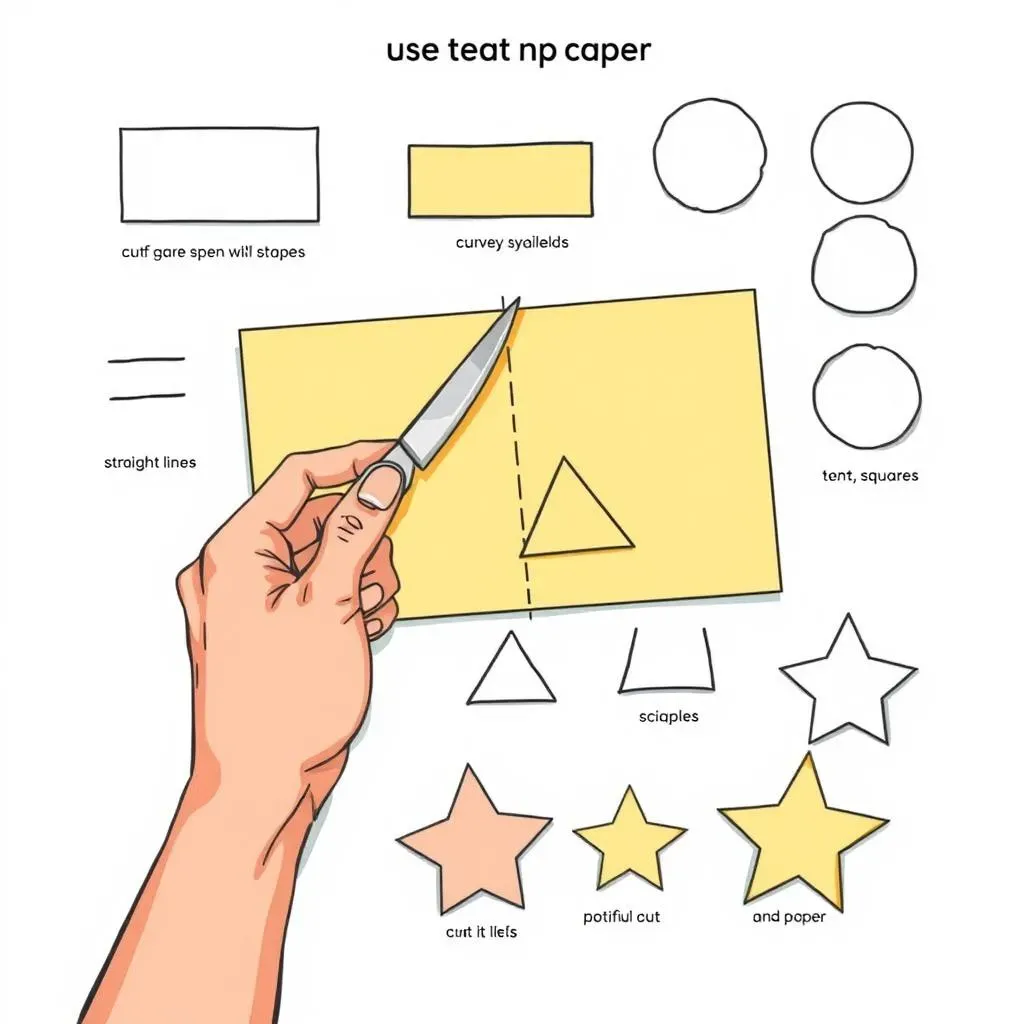
Starting with Straight Lines
Alright, so you've got your tools, now let's talk about the actual cutting. Starting with straight lines, it might seem super simple, but it’s the foundation for everything else. Imagine you are drawing with the scalpel, but instead of ink, you are cutting the paper. Hold the scalpel like a pen, not too tight, but firmly. You want to use a smooth, continuous motion, not a jerky one. Think of it like ice skating, you want to glide across the paper. Don't try to cut through the paper in one go, instead, use a few light passes. This will give you clean edges. Remember, patience is key here; you're not trying to win a paper cutting speed contest.
A good tip is to keep the blade perpendicular to the paper. If you tilt it, you'll get uneven cuts. I learnt this the hard way, my first attempt at a straight line looked like a toddler had attacked it with a butter knife. Another important thing is to rotate your paper rather than your hand. This gives you more control and allows for more precise cuts. Trust me, once you get the hang of it, you'll be cutting straight lines like a pro.
Curved Lines and Circles
Okay, straight lines are down, now let's tackle curves. Curves can be a bit trickier. The key here is to use small, controlled movements. Instead of trying to cut the entire curve in one motion, think of it as a series of tiny straight lines. Rotate the paper as you go, keeping your hand steady. It’s like driving a car, you don’t turn the wheel suddenly, you do it smoothly. For circles, start by cutting a square around the area you want to cut out. Then, round the corners of the square, gradually refining your shape. Don't worry if it's not perfect at first. The more you practice, the better you’ll get. My first circle looked more like a lopsided potato.
Remember, practice makes perfect. And don't be afraid to experiment with different curves. The beauty of paper cutting is that there are no rules, you can create whatever you like. If you find it hard to cut curves, try drawing them lightly on the paper first. This will act like a guide for your blade. Also, try to use the tip of the blade for more intricate curves. Don’t get frustrated if it doesn’t look great the first time, paper cutting is a skill that takes time and practice.
Shape | Technique | Tips |
|---|---|---|
Straight Lines | Smooth, continuous motion, light passes | Keep blade perpendicular, rotate paper |
Curves | Small, controlled movements, tiny straight lines | Rotate paper, use tip of the blade |
Circles | Start with a square, round the corners | Cut gradually, don't rush |
Cutting Different Shapes
Now that we have covered straight lines, curves and circles, let's explore how to cut different shapes. When cutting triangles, use straight line techniques. Start with the outline, and then cut the inside. For squares, follow the same principle as triangles, making sure to rotate your paper as you go. When cutting stars, it’s best to start with the outline, then cut the inner corners. Make sure that you use the tip of the blade to get those sharp points. You should always start with the outline of the shape, and then cut the inside. Remember, take your time and don’t rush the process, and don't forget to rotate the paper, not the blade.
When cutting shapes with lots of tiny details, use the tip of the blade. I would also suggest cutting the inner part first. If you are cutting shapes that have small inner sections, try to cut those first, before cutting the outer lines. This will help you avoid any bending of the paper. Also, remember to leave small supports between the cut-out pieces, this will prevent the design from falling apart. You can always remove those supports when you are done. Paper cutting is a skill, and like any skill, it takes practice to master. Don’t be afraid to fail, and always learn from your mistakes. You can always get better at it.
Advanced Paper Cutting Techniques and Shapes
Advanced Paper Cutting Techniques and Shapes 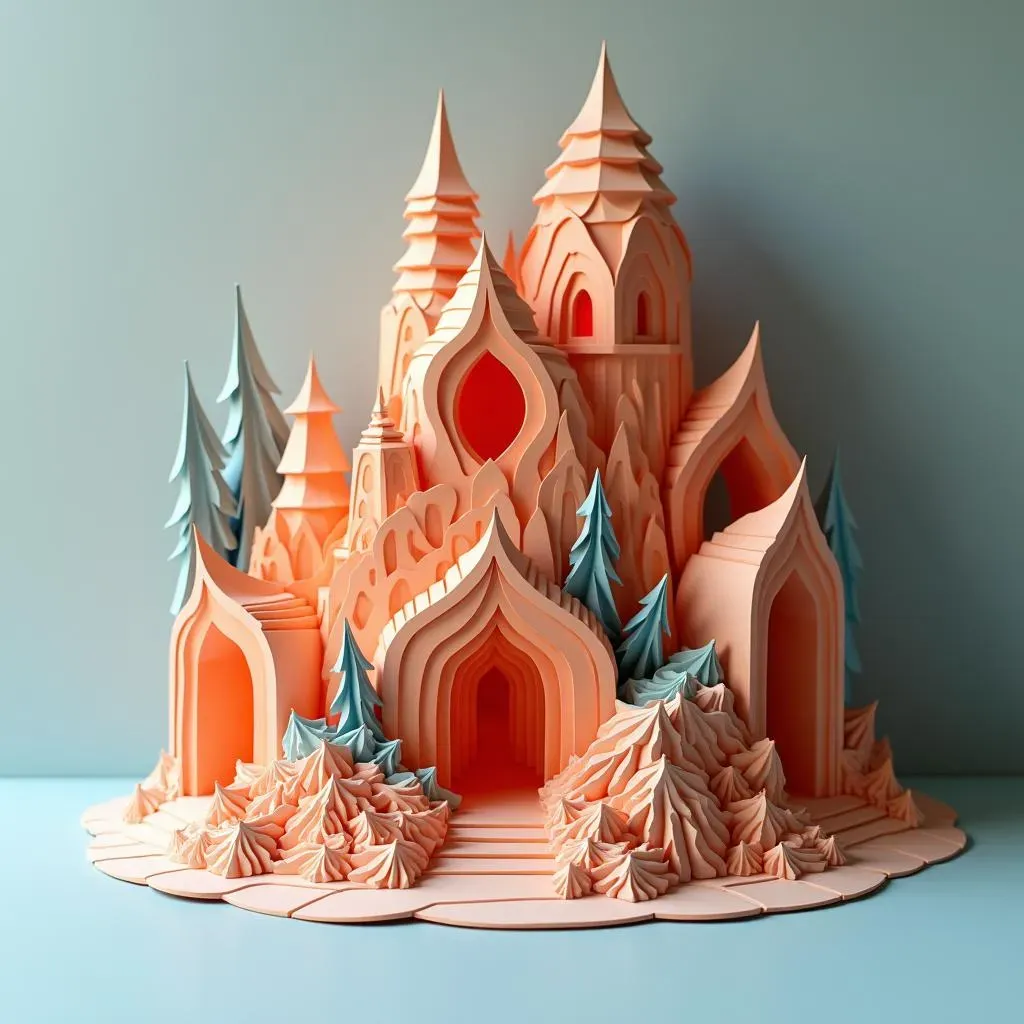
Layering Techniques
Okay, so you've mastered the basics? Time to kick things up a notch! Layering is where paper cutting gets really interesting. Imagine creating a 3D effect just by layering different cut-outs on top of each other. It’s like building a tiny paper sculpture. Start with your background layer, cut out your design, and then layer another cut-out on top. Think of it like making a sandwich, but instead of bread and cheese, you're using paper. The key is to use different colors and textures to create depth. I once made a layered piece of a forest, with trees in the front and mountains in the back. It looked like it was popping right off the page, and it's all thanks to layering.
When you are layering, you can use foam pads or spacers between layers to give it even more depth, it’s like giving your design a little boost. Also, you can cut the same design in different sizes and layer them on top of each other. This will give you a cool shadow effect. The possibilities are endless. Don’t be afraid to experiment and try new things. Layering is all about playing with perspective and creating a visual story with paper. It’s one of my favorite techniques because it adds so much dimension to your work.
Intricate Patterns and Designs
Now, let's talk about intricate patterns. These are the designs that look super complicated but are actually just a series of small cuts. The secret? Patience and a very sharp blade. Start with a simple pattern and gradually work your way up to more complex designs. Think of it like learning to play a musical instrument, you don't start with a concerto; you start with simple notes. When cutting intricate patterns, I find it helpful to divide the design into smaller sections. This makes it less overwhelming. Also, make sure you are using the tip of your blade for those fine details. It’s like using a tiny paintbrush for detailed work.
If you are cutting a symmetrical design, you can fold your paper in half and cut through both layers at the same time. This will give you perfect symmetry. Also, if you are working on a large design, I would suggest cutting out the inner details first. This will prevent the paper from bending or breaking. Remember, Rome wasn't built in a day, and neither will your intricate paper cutting design. So, take your time, and enjoy the process. It's all about the journey, not just the end result.
Technique | Description | Tips |
|---|---|---|
Layering | Creating depth with multiple cut-outs | Use foam pads, different colors and textures |
Intricate Patterns | Complex designs with small cuts | Divide into sections, use tip of the blade |
Symmetrical Design | Folding your paper in half and cut | Make sure the fold is perfect |
Working with Negative Space
Finally, let's not forget about negative space. What is negative space? It's the area around your design that you cut away, it’s the empty space that defines your design. It's like the silence in music, it's just as important as the notes themselves. When cutting, try to think about the overall composition, not just the individual shapes. Think of it like a puzzle, you are not just cutting out shapes, you are creating a whole picture. Sometimes, what you leave behind is more important than what you cut out. The negative space can create a more interesting and dynamic design.
I remember once I was working on a design, and I accidentally cut away a piece that I didn't intend to. But then, I realized that the negative space that it created was actually more interesting than the original design. It was like a happy accident. So, don’t be afraid to experiment with negative space. It can add a new dimension to your paper cutting. The more you play around with it, the more you’ll appreciate how negative space can transform your work. It’s like discovering a hidden dimension in your art.
Troubleshooting Common Issues When Cutting Different Shapes
Troubleshooting Common Issues When Cutting Different Shapes 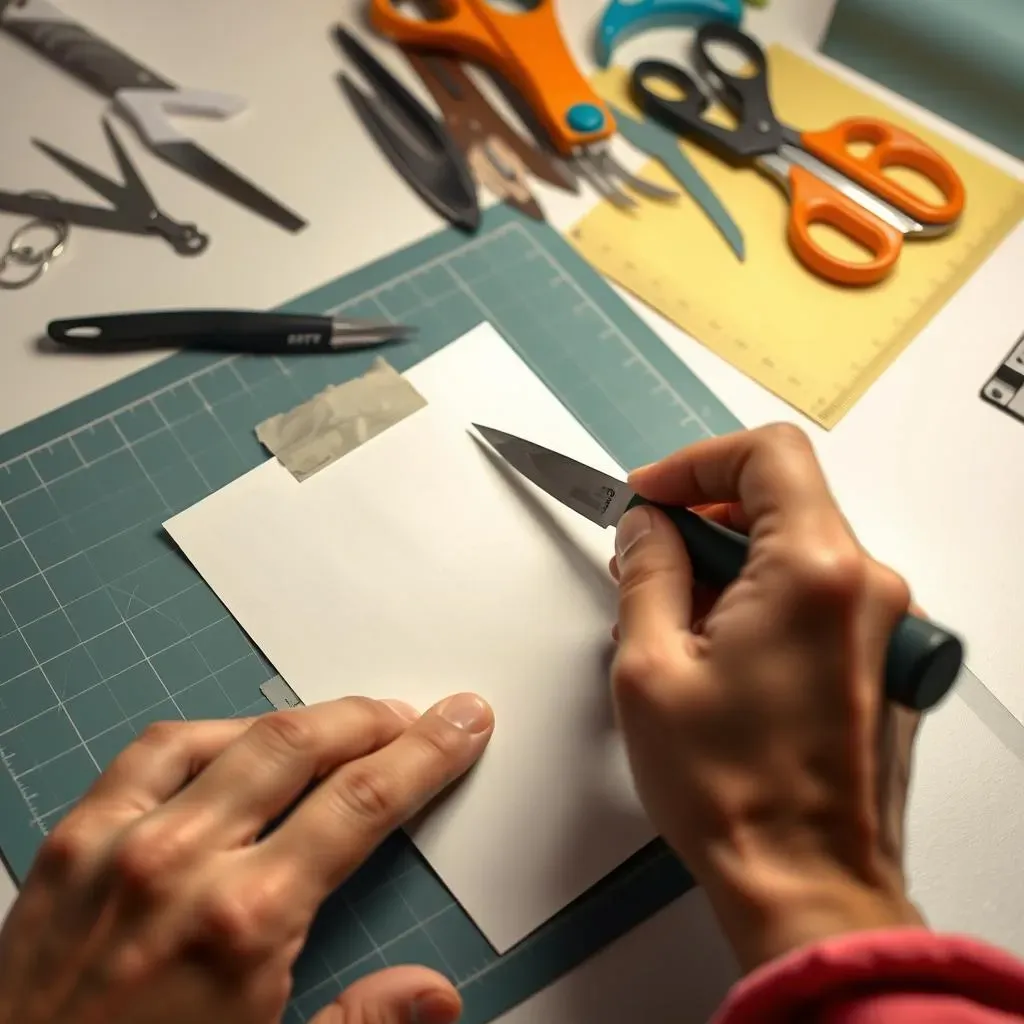
Torn or Jagged Edges
Alright, let's face it, sometimes things go wrong. One of the most common issues is getting torn or jagged edges. It's like trying to cut a steak with a spoon, it just doesn't work. Usually, this happens when your blade is dull. A dull blade will tear the paper instead of slicing it cleanly. It’s like trying to write with a dried-up pen, it’s just frustrating. The solution is simple, change your blade! Also, make sure you are using light passes, instead of trying to cut through the paper in one go. If you are pushing too hard, you can also get jagged edges, so take it easy. It’s like trying to ride a bike, you don’t just jump on and go, you need to take it slow.
Another thing that can cause jagged edges is using the wrong type of paper. If your paper is too thin, it will tear easily. Try using a thicker card stock. Also, make sure that your paper is lying flat on your cutting mat and you are not cutting on an uneven surface. You can even use masking tape to secure the paper to the mat. I remember one time, I tried cutting on a wobbly table, it was a disaster. The paper kept shifting and I got so frustrated. So, make sure your setup is stable and your blade is sharp.
Accidental Cuts and Mistakes
Okay, let's talk about accidental cuts. We all make them. It's like spilling coffee on your favorite shirt, it’s annoying, but it happens. The good news is, most mistakes can be fixed. If you make a small cut in the wrong place, just use a small piece of masking tape to fix it. Or you can use a glue stick to glue the piece back into place. Just make sure you do it carefully, so you don’t make it worse. If the mistake is too big to fix, you can always start again, or you can just embrace the imperfection. Sometimes, those little mistakes add character to your work. It’s like a scar, it tells a story.
I have made so many mistakes when I started paper cutting. I would accidentally cut into the design, or I would cut off a piece that I didn't mean to. But you know what? I learned from those mistakes, and they made me a better paper cutter. So, don’t be afraid to make mistakes, it’s part of the process. Also, try to take breaks when you start to get frustrated, your hand will get tired, and that’s when mistakes happen. I would also suggest that you use a pencil to draw your design first, this will act as a guide. And remember, don't be too hard on yourself, paper cutting is a journey, not a race.
Issue | Possible Cause | Solution |
|---|---|---|
Torn/Jagged Edges | Dull blade, wrong paper, too much pressure | Change blade, use thicker paper, light passes |
Accidental Cuts | Lack of focus, tired hands, no guide | Use masking tape, glue pieces back, take breaks |
Dealing with Tight Corners
Tight corners can be tricky. It's like trying to parallel park in a tiny space, it takes skill and precision. The secret to cutting tight corners is to use the very tip of your blade and rotate your paper very slowly. Think of it like turning a dial on a safe, you need to be careful and deliberate. Don’t try to cut the corner in one go, instead, use a few small passes. Also, try to cut the corner in a curve, instead of trying to make a sharp turn. This will prevent your paper from tearing. Remember, patience is key here, don’t rush the process.
I remember the first time I tried to cut a star, those tight corners were a nightmare. I kept tearing the paper and getting frustrated. But then, I realized that I was trying to cut the corner too quickly, and I was using too much pressure. So, I slowed down, and I started using the tip of my blade, and it made a huge difference. So, if you are having trouble with tight corners, just remember to slow down, use the tip of your blade, and rotate your paper carefully. And don’t be afraid to practice, the more you do it, the better you’ll get.
Paper Lifting or Shifting
Another common problem is when the paper lifts or shifts while you are cutting. It’s like trying to keep a slippery fish in your hands, it’s hard to control. This usually happens when your paper is not properly secured to your cutting mat. The solution is to use masking tape to secure the paper to your cutting mat. Make sure that the tape is not too sticky, or it might tear your paper. Also, make sure that your cutting mat is clean and dry. If it’s dirty or wet, your paper might slip. Try to apply the tape to the edges of the paper, so it doesn’t interfere with your cutting. It’s like making sure your canvas is secure before you start painting.
I have had so many times when my paper would lift or shift mid-cut, and it would ruin the whole design. But then, I started using masking tape, and it made a huge difference. So, if you are having problems with your paper lifting or shifting, try using masking tape. And always make sure that your work surface is clean and dry. Also, if you are cutting a large piece of paper, I would suggest using more tape, to make sure that it is properly secured. Remember, a stable setup is key to a successful paper cutting project.
Issue | Possible Cause | Solution |
|---|---|---|
Tight Corners | Cutting too quickly, too much pressure | Use tip of the blade, rotate paper slowly |
Paper Lifting/Shifting | Paper not secured, uneven surface | Use masking tape, clean work surface |