Table of Contents
Ever wanted a Christmas tree that's both unique and budget-friendly? Forget those pricey store-bought decorations! This guide will show you how to create a beautiful paper Christmas tree using the magic of "christmas tree paper cutting". It's easier than you think, and the result is a stunning, handcrafted piece perfect for your holiday decor. We'll start by gathering our essential materials, then move step-by-step through the cutting and assembly process. I'll also share some handy tips to ensure your tree looks its absolute best, and some creative ideas to help you personalize your paper masterpiece. Whether you're a seasoned crafter or a complete beginner, this project is designed to be fun and rewarding. So, grab your scissors, some paper, and let's get started on this exciting journey of paper crafting!
Gathering Your Supplies for Paper Christmas Tree Cutting
Gathering Your Supplies for Paper Christmas Tree Cutting
Alright, let's talk about getting ready for this paper Christmas tree extravaganza! First, you'll need paper, obviously. Don't just grab any old scrap; think about the look you're going for. Cardstock works great because it's sturdy, but construction paper is fine too, especially if you're making a smaller tree. I like using green paper for the tree itself, but feel free to get creative with colors! You'll also need scissors – a sharp pair is your best friend here. Dull scissors will make this feel like a battle, not a craft. And, of course, glue. I recommend a quick-drying craft glue, because nobody likes waiting for glue to dry. A glue stick can work in a pinch, but liquid glue gives a more secure hold. Finally, some templates are a lifesaver. You can find tons online for free, or even sketch out your own if you're feeling adventurous. Oh, and don't forget some glitter if you want to add some sparkle!
Supply | Recommended Type | Why? |
|---|---|---|
Paper | Cardstock (120-175 gsm) or Construction Paper | Sturdy enough for structure, but easy to fold |
Scissors | Sharp Craft Scissors | Clean cuts, less frustration |
Glue | Quick-drying craft glue or glue stick | Fast adhesion, less mess |
Templates | Printable or hand-drawn | Consistent shapes, easy to follow |
Glitter(Optional) | Fine glitter | Extra sparkle and festive look |
StepbyStep Guide to Christmas Tree Paper Cutting
StepbyStep Guide to Christmas Tree Paper Cutting
Cutting Out Your Tree Pieces
Okay, now for the fun part: cutting! If you're using a template, print it out and carefully place it on your chosen paper. It's like tracing, but with scissors. Start by cutting out the main tree shapes. You'll need quite a few, around 40-50, depending on how full you want your tree to look. Don't worry if they're not perfectly identical; a little variation gives your tree character. Once your pieces are cut, take each one and fold it in half lengthwise. This fold is what gives the tree its 3D look, so make sure it's a nice, crisp fold. I like to use a bone folder for this, but the edge of a ruler works great too. Just run it along the fold to make it sharp.
Once you have all those lovely folded pieces, it's time to assemble your tree. Grab one folded piece, and apply a thin line of glue along one of the folded edges. Be careful not to use too much glue, or it will squish out and make a mess. Then, take another folded piece and carefully align it with the glued edge. Press them together gently, and hold for a few seconds to let the glue set. Keep doing this, adding one piece at a time, until you've got a full circle of tree pieces. It's like building a little paper fort, except way cuter. If you want a taller tree, you can create another layer by gluing more folded pieces on top of the first layer. I'm not going to lie, it can be a little tedious, but the end result is worth it.
Assembling the Tree and Adding Sparkle
Now that you've glued all the pieces together, let it dry completely. You don't want to open the tree before the glue is dry because it could all fall apart. Once everything is dry, gently open the paper tree to reveal its 3D form. It's like watching a flower bloom, but made of paper! If you want to add some sparkle, now is the perfect time. Use a sponge brush to apply a thin layer of glue to the edges of the tree, then sprinkle fine glitter over the glue. I find that using a tray helps catch the excess glitter, so you don't end up with a glitter explosion in your house. Let the glue dry completely again, and then gently shake off the excess glitter.
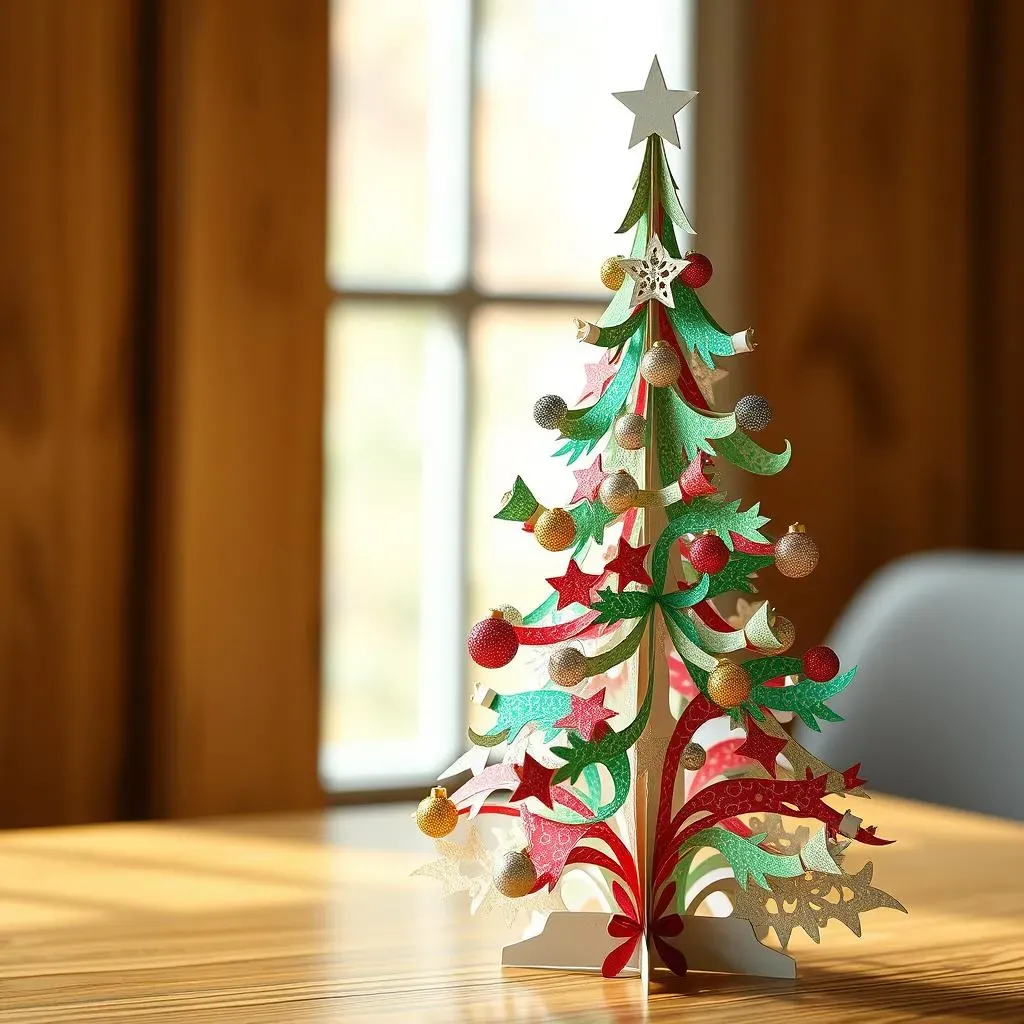
To keep the glitter from shedding everywhere, you can seal it with a Mod Podge spray. It's like hairspray for glitter. If you don't have Mod Podge, you can skip this step, but be prepared for a little glitter to come off over time. And that's it! You've created your very own paper Christmas tree! It's a fantastic feeling, isn't it? I think it looks awesome, and I'm sure yours does too. You can leave it as is, or you can add more decorations like small paper ornaments or ribbons. Feel free to experiment and make it your own.
- Cut out tree shapes using a template or freehand.
- Fold each piece in half lengthwise for a 3D effect.
- Glue folded edges together to form the tree's layers.
- Let the glue dry completely before opening the tree.
- Add glitter to the edges for extra sparkle.
- Seal the glitter with Mod Podge to prevent shedding.
Tips for Perfecting Your Paper Christmas Tree
Tips for Perfecting Your Paper Christmas Tree
Achieving Clean Cuts and Precise Folds
Alright, let's talk turkey – or should I say, tree? Getting those cuts just right is key to a professional-looking paper Christmas tree. First off, invest in a good pair of scissors. Those dull, kid-friendly scissors aren't going to cut it (pun intended!). Sharp, precise scissors will make your cuts cleaner and easier, and you won't be fighting the paper every step of the way. Also, don't try to cut too many layers of paper at once. It's better to cut one or two layers at a time to avoid jagged edges. And when you're following your template, take your time. Rushing will only lead to mistakes, and trust me, you don't want to be re-cutting pieces over and over. Now, about those folds – a crisp fold is like a secret weapon. It really makes the tree pop. If you're struggling to get a sharp fold with your fingers, try using a bone folder or even the edge of a ruler. Just run it along the fold line to create a nice, clean crease. It's a game changer, I swear.
Another thing that can help is using a cutting mat. Not only does it protect your table, but it also provides a smooth surface for cutting. Also, consider using a rotary cutter if you have one. These are fantastic for cutting straight lines and curves. Remember that practice makes perfect. Don't be discouraged if your first few pieces aren't perfect. Keep practicing, and you'll get the hang of it. And remember, even if your cuts are a bit wonky, it's still going to be a unique, handmade tree. That's the beauty of it! And if you have small kids helping, embrace the imperfections, that is what make it special.
Troubleshooting Common Issues
Okay, so let's face it: things don't always go smoothly when you're crafting. One of the biggest problems I see people have is with the glue. Too much glue can make a mess, and not enough glue can make your pieces fall apart. The trick is to use a thin, even layer of glue. It's better to use less glue and add more if needed, rather than starting with a big blob. If you're using liquid glue, try using a fine-tipped applicator to get more control. If you do get glue where you don't want it, try wiping it off right away with a damp cloth. Another issue is that sometimes the pieces don't align correctly. If this happens, don't panic. Just gently pull the pieces apart and try again. It's like solving a little puzzle, and you'll get the hang of it.
And what if your tree is wobbly? It might be because the base isn't sturdy enough. If this happens, consider adding a small cardboard circle or a few extra layers of paper to the bottom to give it more support. Also, remember that every paper is different. Some papers are thicker, some are thinner, and they all react differently to glue and folding. If you find that your paper is too flimsy, try using a thicker paper. And if your paper is too stiff, try scoring your fold lines before folding. Don't give up if things don't work out the first time. Crafting is all about learning and experimenting. Each mistake is just a step closer to perfection!
Issue | Solution |
|---|---|
Jagged cuts | Use sharp scissors, cut one or two layers at a time |
Uneven folds | Use a bone folder or ruler edge for crisp folds |
Too much glue | Apply a thin layer, use a fine-tipped applicator |
Misaligned pieces | Gently pull apart and re-align |
Wobbly base | Add a cardboard circle or extra paper layers |
Creative Ideas and Variations for Your Paper Cut Christmas Tree
Creative Ideas and Variations for Your Paper Cut Christmas Tree
Okay, so you've mastered the basic paper Christmas tree, that's awesome! But, let's be honest, that's just the beginning. It's time to unleash our creativity and explore some fun variations! First, let's talk about color. Who says Christmas trees have to be green? You could make a stunning white tree for a snowy effect, or go wild with metallic paper for a glamorous look. I've even seen people use rainbow-colored paper to create a truly unique tree. And don't just stick to plain paper! Experiment with textured paper, patterned paper, or even recycled materials like old book pages or maps. The possibilities are endless! Another way to add flair is to change up the tree's shape. Instead of just using basic triangles, you can experiment with different shapes for the tree pieces. Try using rounded shapes for a softer look, or jagged shapes for a more whimsical feel. You can also vary the size of the pieces to create a more interesting silhouette.
And let's not forget about embellishments! Glitter is always a great option, but you can also add other decorations like small paper ornaments, ribbons, or even tiny pom-poms. You can use a hole punch to create small circles out of colored paper and glue them onto the tree as ornaments. Or, cut out tiny stars and snowflakes and attach them to the branches. I've even seen people use small beads and sequins to add some extra sparkle. If you're feeling really ambitious, you can try creating a paper cut design on the tree itself. It's a bit more advanced, but the results are stunning. You can use a craft knife to carefully cut out intricate patterns on the tree pieces before assembling them. It's like creating a paper lace effect, and it looks absolutely amazing. Remember, the goal is to have fun and experiment. Don't be afraid to try new things and make your paper Christmas tree truly your own.
Variation | Description | Tip |
|---|---|---|
Color | Use non-traditional colors like white, gold, or rainbow | Experiment with different paper types (metallic, patterned) |
Shape | Use varied shapes, like rounded or jagged edges | Vary the size of the pieces for a more interesting look |
Embellishments | Add paper ornaments, ribbons, pom-poms | Use beads and sequins for extra sparkle |
Paper cut design | Cut out intricate patterns on tree pieces | Use a craft knife for precise cuts |
Want to take your paper Christmas tree to the next level? Consider making a 3D layered tree. It's like creating a mini paper sculpture. Instead of just gluing pieces flat, you can create multiple layers of the tree and space them out to create a more dimensional look. You can do this by using small pieces of foam or cardboard to separate each layer. This gives the tree depth and makes it look more realistic. You could also try making a mini paper tree village, using different sizes and colors of paper. It would make a lovely centerpiece for a table or a window display. And if you're feeling really creative, you can try making a paper tree garland. Just string together multiple small paper trees using some thread or string. It's a great way to decorate a mantel or a doorway.
You could even use your paper tree as a base for a light display. Wrap some fairy lights around the tree for a beautiful, soft glow. I've seen people use battery-operated lights to make the tree portable. It's a great way to add some festive cheer to any room. The key is to have fun and let your imagination run wild. There are no rules when it comes to crafting, so don't be afraid to experiment and try new things. The best part about making your own paper Christmas tree is that it's completely unique and one-of-a-kind. It's a reflection of your personality and creativity. And that's something you can be truly proud of.
- Create a 3D layered tree for a dimensional look.
- Make a mini paper tree village for a centerpiece.
- Craft a paper tree garland for festive decor.
- Add fairy lights for a soft glow.
- Use recycled materials for an eco-friendly project.
