Table of Contents
Ever dreamt of a blouse that fits you like a glove, without the hassle of endless alterations? The secret lies in mastering the art of the "blouse paper cutting pattern." Forget those ill-fitting store-bought blouses; with the right pattern, you're the designer. This isn't some secret code only expert tailors know. It's a straightforward process that anyone can learn. In this article, we'll take you from understanding the basics of blouse paper cutting patterns to actually using them. We'll explore different pattern types, guide you through the steps of cutting fabric, and offer some handy tips to avoid common mistakes. We'll show you how to choose the perfect pattern for your body and style. Ready to create blouses that make you feel amazing? Let's get started and unlock the world of perfect fits with blouse paper cutting pattern.
Understanding Blouse Paper Cutting Patterns
Understanding Blouse Paper Cutting Patterns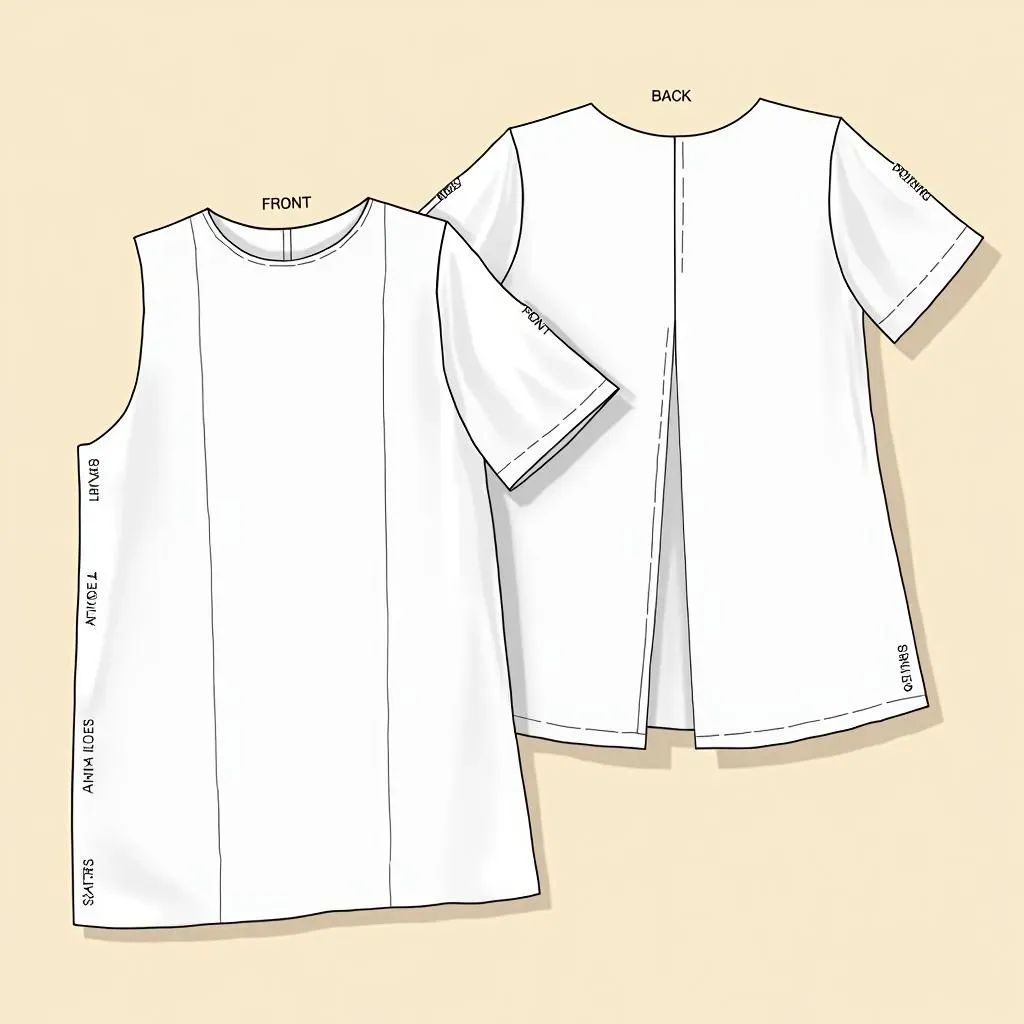
What Exactly is a Blouse Paper Cutting Pattern?
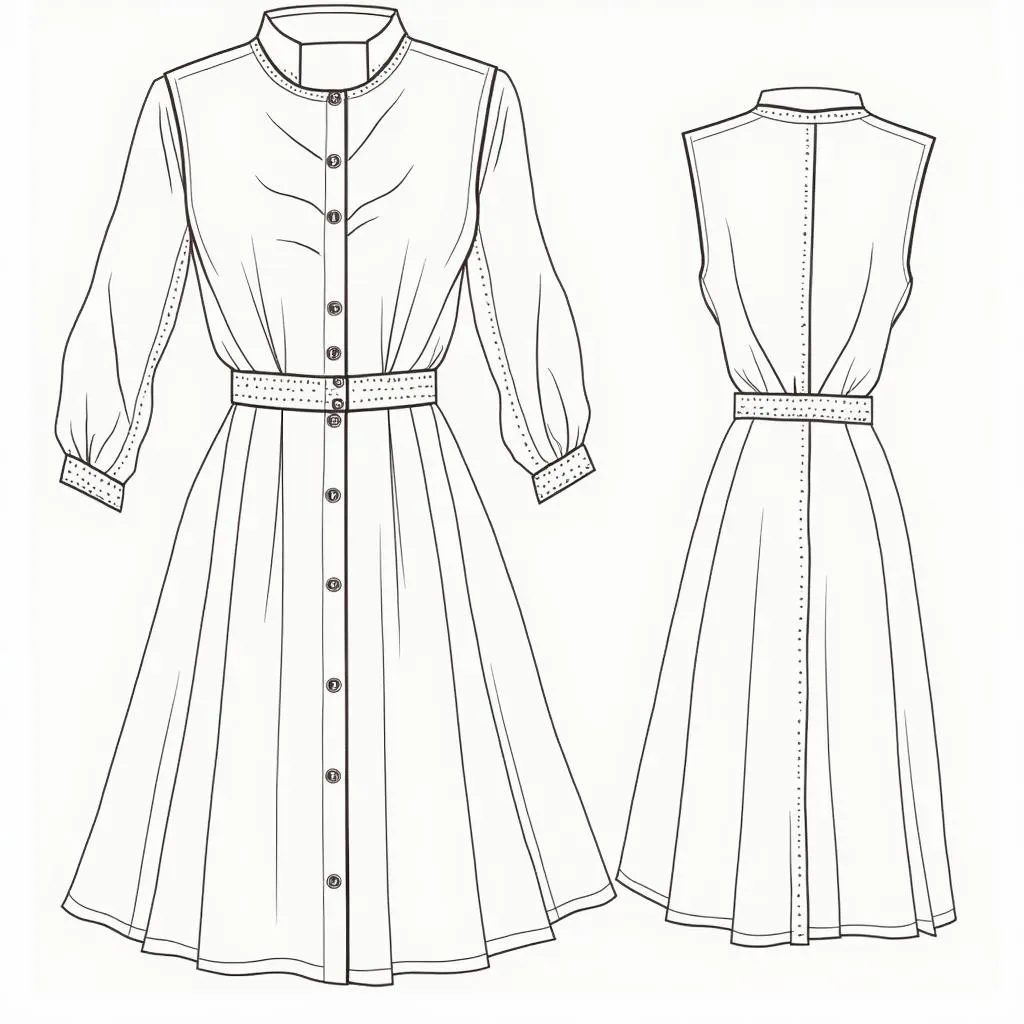
Okay, so you're curious about blouse paper cutting patterns? Think of them as a roadmap for your sewing project. It's like a blueprint, but for a blouse! Instead of bricks and mortar, you're dealing with fabric and thread. These patterns are usually made of paper and come with all the pieces you need to cut out your blouse, each piece labeled with what it is – the front, the back, the sleeves, and any extra bits like collars or cuffs. They're designed to help you cut your fabric accurately, so everything fits together perfectly. It's not magic, just clever design!
These patterns are more than just shapes on paper; they're a language of sewing. They use lines, notches, and symbols that might look confusing at first, but they actually give you very specific instructions. For example, notches tell you where to match one piece of fabric to another, and grain lines show you which direction the fabric should run. Understanding these markings is key to getting a well-fitting blouse. It's like learning to read a new map, but instead of a treasure, you get a beautiful garment!
Pattern Marking | What It Means |
|---|---|
Solid Line | Cutting Line |
Dotted Line | Stitching Line |
Notches | Match points |
Grain Line | Fabric alignment |
Why Use a Pattern Anyway?
You might be thinking, "Why can't I just cut out some fabric and sew it together?" Well, you *could*, but you'd likely end up with a blouse that's a bit wonky. Blouse patterns are there to make sure the blouse fits the way it should. They have been crafted with measurements and shapes to follow the curves of our body. They eliminate the guesswork, so you don't waste a lot of fabric. It's like using a recipe when you bake a cake instead of just throwing ingredients together and hoping for the best. A pattern guides you through the process, ensuring you get a great result.
Using a pattern is also a great way to learn about garment construction. You start to see how flat pieces of fabric transform into a three-dimensional garment. You begin to understand the purpose of each piece and how they all work together. It’s like putting together a puzzle, where each piece needs to fit just right. Patterns are a fantastic learning tool, even if you aren't planning on becoming a professional tailor. It's a skill that can help you create unique and stylish clothes that fit you perfectly.
Choosing the Right Blouse Paper Cutting Pattern
Choosing the Right Blouse Paper Cutting Pattern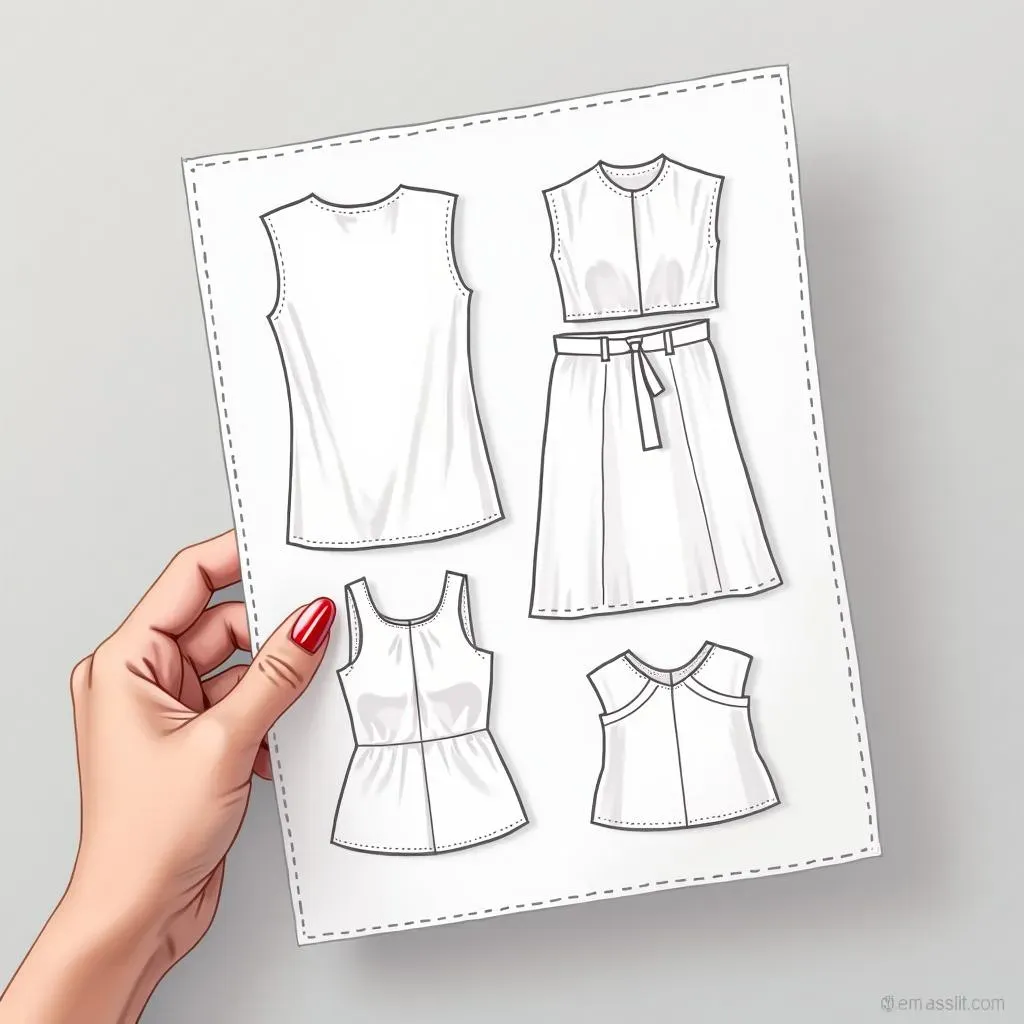
Finding Your Perfect Match in Patterns
Okay, so you're ready to pick a pattern, but where do you even begin? It's like walking into a candy store; there are so many options, it can be overwhelming! But don't worry, it's not as hard as it looks. The first thing you need to think about is your skill level. If you're new to sewing, don't jump straight into a complicated design with lots of darts and tricky curves. Start with something simple. Look for patterns labeled "easy" or "beginner-friendly." These usually have fewer pieces and straightforward instructions. It's better to start small and build confidence, rather than getting frustrated with a project that's too complex. Think of it like learning to ride a bike; you wouldn't start with a unicycle, would you?
Next, consider your body type and the style of blouse you want. Are you looking for something fitted or loose? Do you prefer a classic button-down or a flowy bohemian look? Different patterns are designed to flatter different body shapes. Some patterns are cut for a more hourglass figure, while others are better suited for a straighter build. Take a look at the pattern envelope; it usually shows a picture of the finished blouse, which will give you a good idea of the style. It will also tell you what sizes the pattern includes. Make sure you choose a pattern that fits your measurements. Don't assume you're always the same size in every pattern; it's always best to measure yourself and compare to the pattern's size chart. It’s like trying on shoes, you wouldn't grab a random size, right?
Understanding Pattern Sizes and Styles
Pattern sizes aren't like clothing sizes you find in stores, they are different, which can be super annoying, I know! So don't get caught up on what size you normally wear. Instead, grab a measuring tape and take your bust, waist, and hip measurements. Compare those numbers to the pattern's size chart. You might find that you're a different size in the pattern world than you are in the real world! Also, pay attention to the "ease" included in the pattern. Ease is the extra room built into the pattern for movement and comfort. Some patterns have more ease than others, which affects the fit of the final garment. So, if a pattern says it has "generous ease", it means it'll be looser than a pattern with "close fit". It’s like choosing between a comfy sweatshirt and a fitted t-shirt.
And let's talk about styles. There are so many different blouse styles out there. From classic princess-cut blouses to trendy off-the-shoulder tops, the possibilities are endless. Think about what you'll wear it with and where you'll wear it. A simple, classic style can be dressed up or down, while a bold, statement blouse might be perfect for a special occasion. Don't be afraid to experiment and try different styles. You might surprise yourself and discover a new favorite. It’s like trying different flavors of ice cream – you never know what you might love until you try it!
Pattern Type | Description | Best for |
|---|---|---|
Princess Cut | Features curved seams for a tailored fit. | Fitted blouses, flattering for curves. |
A-Line | Flared from the shoulders, loose and comfortable. | Casual wear, good for all body types. |
Boxy | Straight cut, relaxed fit. | Modern, easy-to-wear designs. |
Wrap | Overlapping panels that tie or fasten at the side. | Adjustable fit, flattering to most shapes. |
StepbyStep Guide to Using Blouse Paper Cutting Patterns
StepbyStep Guide to Using Blouse Paper Cutting Patterns
Getting Ready to Cut
Alright, so you've chosen your pattern, and you're itching to get started, right? Hold your horses, there are a few things we need to do first. It's like prepping your ingredients before cooking. First, you should always pre-wash your fabric. This is super important because fabric can shrink when you wash it for the first time, and you don't want your finished blouse to end up too small. It's like buying a new pair of jeans, you wash them first before wearing them. Once your fabric is clean and dry, give it a good iron. You want a flat surface so you can cut accurately. Next, lay your fabric out on a large table or on the floor. It's best to use a surface where you can move around easily. Make sure the fabric is smooth and without any wrinkles, it's like having a smooth canvas before you start painting.
Now it's time to get your pattern pieces ready. Carefully cut out each piece along the solid lines. Don't rush this step, accuracy is key. Once they are all cut out, you'll need to iron them flat, especially if they are wrinkled from being stored. Now, place the pattern pieces on your fabric, following the pattern's layout guide. This guide will show you the most efficient way to arrange all your pattern pieces on your fabric to avoid wasting any material. Pay close attention to the grain lines on the pattern pieces and make sure they are aligned with the grain of your fabric. You can usually see the grain by the way the fabric weave looks. Use pins to secure the pattern pieces to the fabric, making sure they don't move around. It's like securing a map to your desk before you start planning your trip, you want everything to stay in place.
Cutting Your Fabric
Okay, this is where the magic happens! With your pattern pieces pinned securely to your fabric, it's time to cut. Use sharp fabric scissors or a rotary cutter for the best results. Follow the solid lines on the pattern pieces carefully, and take your time. Avoid jagged edges, it's like cutting a straight line on paper, you want it to be smooth. Keep your scissors moving smoothly and consistently. Once you've cut around the first piece, don't move the fabric yet. Instead, move around all the other pattern pieces, cutting each one out. It's like moving through a maze, you need to stay on the path.
After you've cut out all the pieces, you might see some markings on the pattern pieces. These are notches, dots, or other symbols that help you match the pieces together. You'll need to transfer these markings to your fabric. You can use a fabric marker or tailor's chalk to do this. Be sure to use a marking tool that will disappear after washing. Once you've transferred all the markings, carefully remove the pattern pieces from the fabric. Now you should have all the pieces of your blouse, ready to be sewn together. It's like having all the pieces of a puzzle, now it's time to put them together.
Step | Action | Tips |
|---|---|---|
1 | Pre-wash and iron fabric | Avoid shrinkage and wrinkles. |
2 | Cut out pattern pieces | Cut carefully along the solid lines. |
3 | Lay out pattern on fabric | Follow the layout guide, align grain lines. |
4 | Pin pattern pieces to fabric | Secure the pieces so they don't move. |
5 | Cut out fabric | Use sharp scissors, cut smoothly. |
6 | Transfer markings | Use a fabric marker, transfer notches and dots. |
Tips and Tricks for Flawless Blouse Paper Cutting Patterns
Tips and Tricks for Flawless Blouse Paper Cutting Patterns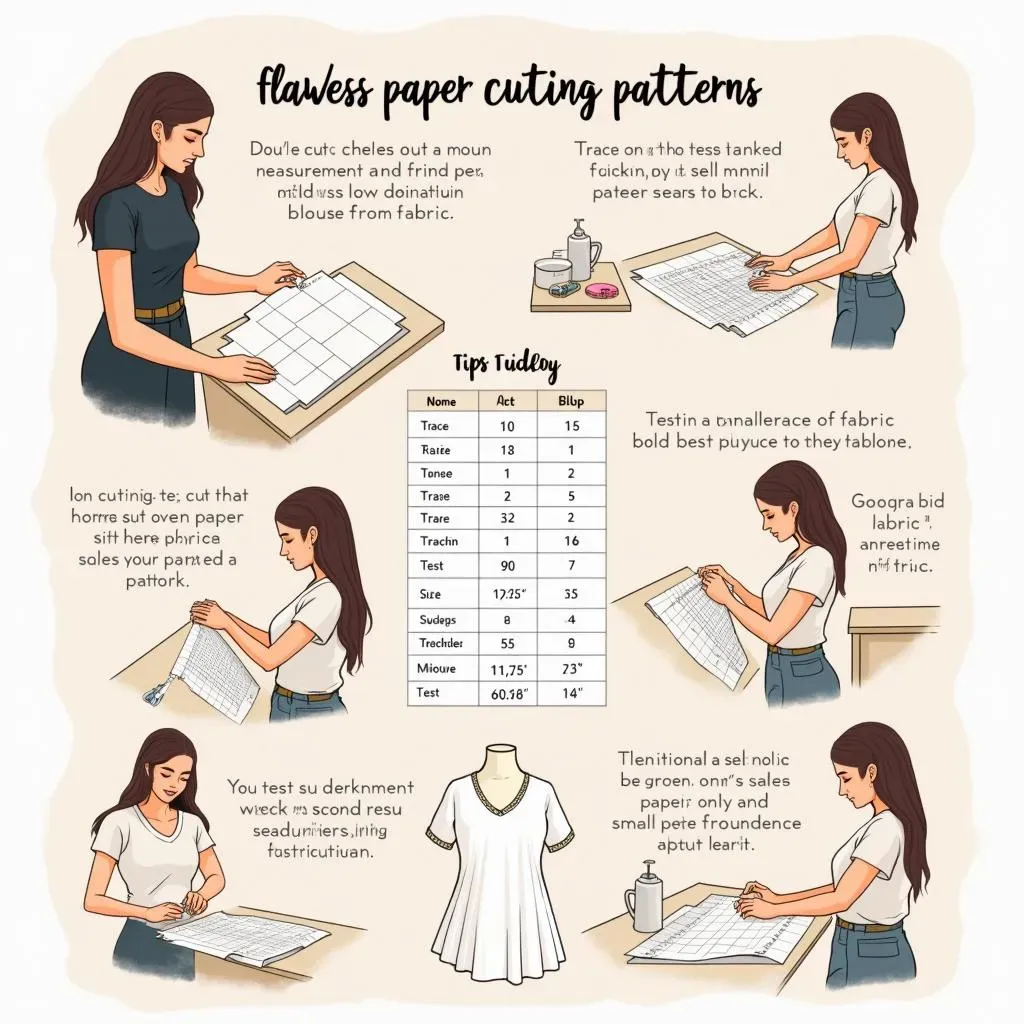
Making Your Patterns Work for You
Okay, let's talk about making your blouse paper cutting patterns work like a charm. First off, always, and I mean *always*, double-check your measurements against the pattern size chart. Don't just assume you're a size 10 because that's what you usually wear. Pattern sizes can be wildly different from store-bought sizes, it's like comparing apples and oranges. Take a fresh set of measurements each time you start a new project, you might be surprised how much your body can fluctuate. Another great tip is to trace your pattern onto tracing paper or pattern paper. This way, you can keep your original pattern intact, and you can make adjustments to the tracing without ruining your original. It's like having a backup copy of your favorite book, just in case. Plus, tracing allows you to mix and match different sizes if you find yourself between sizes in the bust, waist, or hips. It's all about getting that perfect custom fit!
Now, let's talk about fabric. Different fabrics behave differently, and this can affect the way your blouse fits. A lightweight fabric might drape beautifully, while a stiff fabric might have more structure. When you're starting out, try to choose a fabric that's easy to work with, like cotton or linen. These fabrics are stable and don't slip around as much as silk or rayon. Always, always, always test sew a small piece of fabric before cutting your entire blouse. This will help you get used to the fabric and make sure your machine is set up correctly. It's like doing a practice run before the big race. And finally, never be afraid to make adjustments to your patterns. If the sleeves are too long, or the waist is too loose, it's perfectly fine to tweak the pattern to suit your needs. It's your blouse, after all, so you should make it fit you perfectly. Sewing is all about experimentation and learning as you go, so don't be afraid to try new things.
Tip | Why it matters |
|---|---|
Double-check measurements | Ensures accurate size choice. |
Trace patterns | Keeps original intact, allows for adjustments. |
Choose fabric wisely | Affects fit and drape of the blouse. |
Test sew | Prevents mistakes with fabric and machine. |
Make adjustments | Customizes fit to your body. |
Advanced Techniques for a Professional Finish
Ready to take your blouse-making skills to the next level? Let's talk about some advanced techniques that can make your finished product look like it came from a high-end boutique. First up, let's talk about staystitching. Staystitching is a line of stitching done close to the edge of the fabric, usually on curved or bias-cut edges. This technique helps to prevent the fabric from stretching out of shape while you're handling it. It's like putting a tiny fence around your fabric pieces, keeping them in line. Another great tip is to interface your facings. Facings are pieces of fabric used to finish necklines, armholes, and other openings. Interfacing adds structure and stability to these areas, preventing them from stretching or sagging over time. It's like adding a layer of strength to the edges of your blouse.
Now, let's talk about pressing. Pressing is not the same as ironing; it's more about gently lifting and setting your seams. Pressing your seams as you sew them is super important. It helps to flatten the fabric and create a smooth finish. A good pressing routine can make a huge difference in the final look of your blouse. And finally, don't forget about finishing your seams. There are several ways to finish your seams, from using pinking shears to serging, or even using a zigzag stitch on your sewing machine. Finishing your seams prevents them from fraying and makes your garment last longer. It's like adding a protective layer to your seams, ensuring they won't unravel over time. These extra steps might seem like a lot of work, but they’ll be worth it when you see the professional quality of your finished blouse. Remember, sewing is a journey, and with each project, you'll learn new techniques and improve your skills. It's a skill that takes time and patience, but the rewards are worth it.