Table of Contents
Tired of blouses that just don't fit right? You're not alone. Finding the perfect fit off the rack can feel impossible, especially when it comes to blouses. That's where the magic of a 32 size blouse paper cutting pattern comes in. Forget settling for "close enough." With a well-crafted pattern, you can create blouses that hug your curves in all the right places, reflecting your unique style and body shape. This article is your ultimate guide to mastering the art of 32 size blouse paper cutting. We'll walk you through everything from selecting the right tools and materials to understanding the pattern itself and making essential customizations for a flawless fit. Whether you're a seasoned seamstress or a curious beginner, get ready to unlock the secrets to creating stunning, perfectly fitted blouses with our comprehensive, step-by-step instructions. Say goodbye to ill-fitting clothes and hello to a wardrobe filled with garments you'll truly love to wear. Let's get started on your 32 size blouse paper cutting journey!
Why a 32 Size Blouse Paper Cutting Pattern is a Wardrobe GameChanger
Why a 32 Size Blouse Paper Cutting Pattern is a Wardrobe GameChanger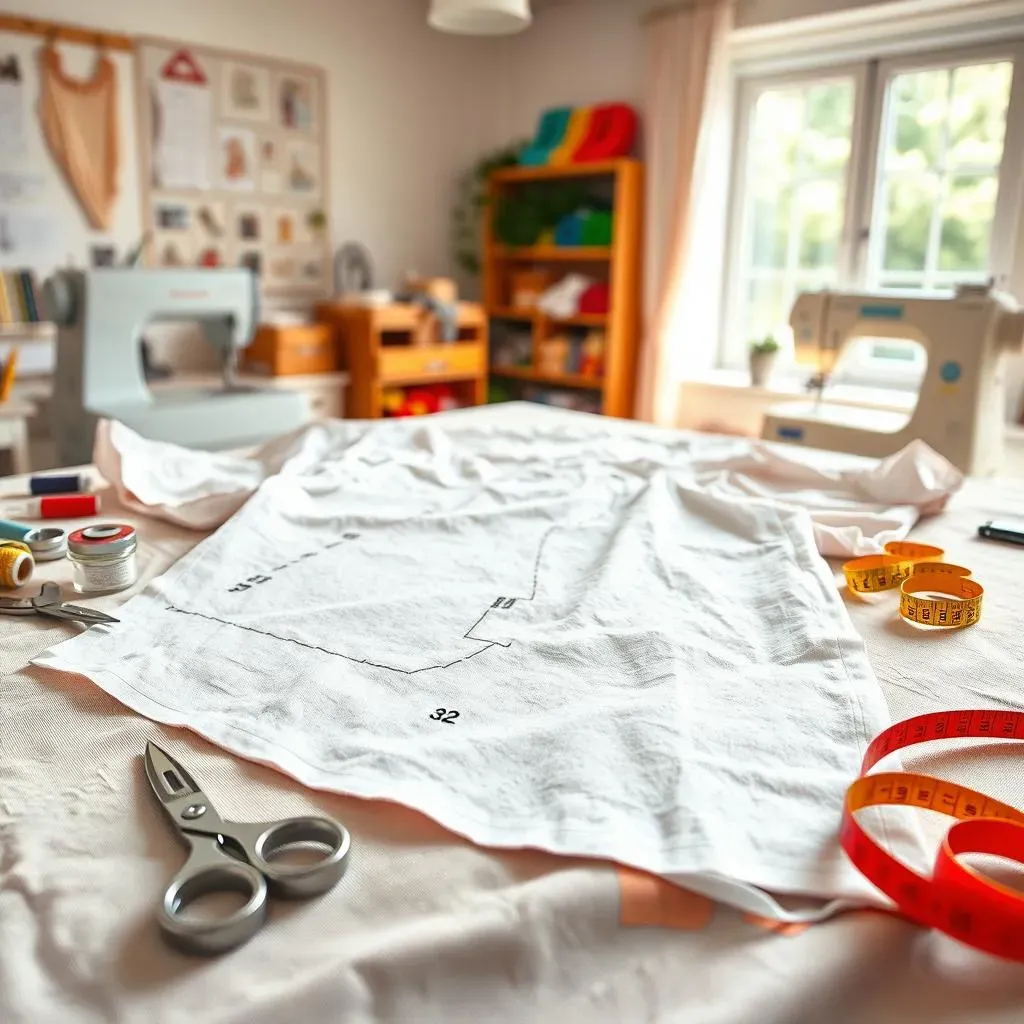
The Perfect Fit, Finally!
Let's face it: standard sizing is a myth. Clothes are mass-produced to fit a general mold, and that mold rarely matches our unique bodies. A 32 size blouse paper cutting pattern puts you in control. No more gaping busts, tight shoulders, or awkward lengths. You get to create a blouse that's perfectly tailored to your measurements, ensuring a comfortable and flattering fit. It's like having a custom-made garment without the hefty price tag of a professional tailor.
Have you ever bought a blouse that fit perfectly in the shoulders but was too tight in the bust? Or vice versa? With a paper cutting pattern, you can kiss those frustrating compromises goodbye. You're the designer, the fitter, and the creator of your own sartorial destiny!
Unleash Your Inner Designer
Beyond the perfect fit, a 32 size blouse paper cutting pattern opens up a world of creative possibilities. Want a different neckline? Easy. Prefer flutter sleeves to classic cuffs? Go for it! You can modify the pattern to reflect your personal style and create truly unique garments. It's an opportunity to experiment with different fabrics, embellishments, and design details, transforming a basic pattern into a one-of-a-kind masterpiece.
Think of it as a blank canvas for your imagination. Whether you're into vintage chic, modern minimalism, or bohemian flair, a paper cutting pattern allows you to bring your vision to life. You're not just sewing a blouse; you're crafting a statement piece that reflects your personality and individuality.
Sustainable and Budget-Friendly Fashion
In a world of fast fashion and disposable clothing, learning to sew your own garments is a revolutionary act. A 32 size blouse paper cutting pattern empowers you to create sustainable and ethical fashion choices. You can source eco-friendly fabrics, repurpose vintage materials, and reduce your reliance on mass-produced clothing. Plus, let's be real, sewing your own blouses can save you a ton of money in the long run.
- Choose organic cotton or linen.
- Repurpose old curtains or tablecloths.
- Shop at local fabric stores to support small businesses.
Imagine the satisfaction of wearing a beautiful blouse that you made yourself, knowing that you're contributing to a more sustainable and ethical fashion industry. It's a win-win situation for your wardrobe and the planet.
Essential Tools and Materials for Your 32 Size Blouse Paper Cutting Project
Essential Tools and Materials for Your 32 Size Blouse Paper Cutting Project
The Sewing Essentials
Alright, let's talk tools! You can't conquer a 32 size blouse paper cutting project without the right gear. First up, you'll need a reliable sewing machine. Nothing fancy is required, just something that can handle a variety of fabrics and stitch types. Next, invest in a good pair of fabric scissors. Trust me, dull scissors are the enemy of clean cuts and happy sewing. A seam ripper is your best friend for those inevitable "oops" moments, and a measuring tape is crucial for accurate measurements and pattern adjustments.
Don't forget the basics: pins, needles, thread, and a hand-sewing needle. Choose thread that matches your fabric, and select needles appropriate for the fabric weight. A well-stocked sewing kit is like a superhero's utility belt – always ready for action! And hey, a cute pin cushion never hurts either. It's the little things that make sewing more enjoyable.
Tool | Why You Need It |
|---|---|
Sewing Machine | To stitch your blouse together |
Fabric Scissors | For clean and precise fabric cuts |
Seam Ripper | To fix mistakes (we all make them!) |
Measuring Tape | For accurate measurements |
Pattern Perfection
Now, let's get to the heart of the matter: the 32 size blouse paper cutting pattern itself. You can find patterns online, in sewing books, or at fabric stores. Make sure you choose a pattern specifically designed for a size 32 bust. Read the pattern instructions carefully before you even think about cutting into your fabric. Familiarize yourself with the different pattern pieces and markings. A clear understanding of the pattern is half the battle.
Consider using pattern weights to hold the pattern in place while cutting. This is way better than pins, especially on delicate fabrics. And speaking of fabric, choose something that drapes well and is easy to sew. Cotton, linen, and rayon are all great options for beginner-friendly blouses. Remember, practice makes perfect, so don't be afraid to start with a simple pattern and work your way up to more complex designs.
StepbyStep Guide to Using a 32 Size Blouse Paper Cutting Pattern
StepbyStep Guide to Using a 32 Size Blouse Paper Cutting Pattern
Decoding the Pattern
Alright, you've got your 32 size blouse paper cutting pattern. Now what? Don't be intimidated by all those lines and symbols! The first step is to understand what you're looking at. Most patterns come with a key that explains the different markings. You'll see solid lines, dashed lines, dots, notches, and grainlines. Each one has a specific purpose, so pay close attention. Solid lines usually indicate the cutting lines, while dashed lines might represent seam allowances or fold lines. Notches are essential for matching pattern pieces together accurately.
Before you even touch your fabric, take some time to trace the pattern onto tracing paper. This way, you can preserve the original pattern and make any necessary alterations without damaging it. Plus, tracing allows you to reuse the pattern multiple times in different sizes if needed. Trust me, your future self will thank you for taking this extra step. Label each pattern piece clearly with its name and pattern number. Organization is key to a successful sewing project!
Cutting with Confidence
tracing is done, now it's time for the big chop! Lay your fabric flat on a large, stable surface. Make sure the fabric is smooth and wrinkle-free. Place the pattern pieces onto the fabric according to the pattern layout guide. This guide shows you how to arrange the pieces efficiently to minimize fabric waste. Pin the pattern pieces securely to the fabric, making sure to align the grainline with the fabric grain. This is crucial for ensuring that your blouse hangs properly.
Using your sharp fabric scissors, carefully cut along the cutting lines of each pattern piece. Cut slowly and steadily, following the lines as accurately as possible. Remember, precision is key! After cutting out all the pieces, transfer any markings from the pattern onto the fabric using tailor's chalk or a fabric marker. These markings will guide you during the sewing process. Clip the notches carefully, making sure not to cut past the seam allowance. Now you're ready to start sewing!
Customizing Your 32 Size Blouse Paper Cutting Pattern for a Perfect Fit
Customizing Your 32 Size Blouse Paper Cutting Pattern for a Perfect Fit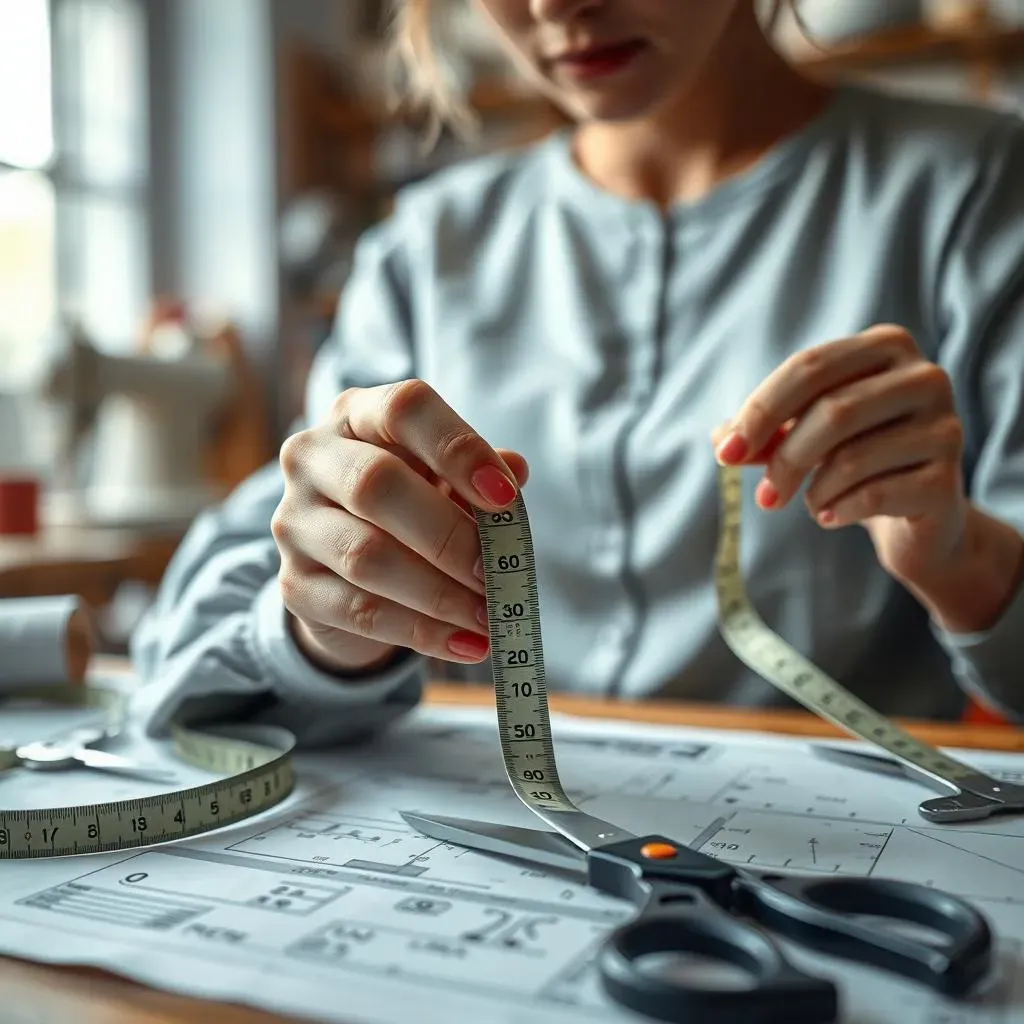
The Importance of Customization
you've got your 32 size blouse paper cutting pattern, you've traced it, and you're ready to cut, right? Hold up! Before you take those scissors to your precious fabric, let's talk customization. Remember that "perfect fit" we're chasing? It rarely comes straight from the pattern envelope. Our bodies are unique, and patterns are drafted for a hypothetical "average" figure. Customizing your pattern is the key to achieving a truly tailored fit that flatters your individual shape. It's about making the pattern work for you, not the other way around.
Think of it like this: you wouldn't buy a pair of shoes without trying them on, would you? The same principle applies to sewing. Taking the time to customize your pattern will save you headaches and frustration down the line. It's an investment in a garment that you'll love to wear for years to come. So, grab your measuring tape, your tracing paper, and let's get ready to personalize that pattern!
Taking Accurate Measurements
Before you can customize your 32 size blouse paper cutting pattern, you need accurate measurements. Grab a friend (or a mirror) and a flexible measuring tape. Measure your bust, waist, and hips at their fullest points. Be sure to wear the type of bra you'll be wearing with the blouse. Also, measure from the high point of your shoulder to your bust point (this is your bust apex measurement) and from your shoulder to your waist. Write everything down! Don't rely on your memory.
Compare your measurements to the pattern's finished garment measurements. This will tell you where you need to add or subtract fabric. Keep in mind that patterns usually include "ease," which is extra room for movement and comfort. If your bust measurement is larger than the pattern's bust measurement, you'll need to do a bust adjustment. If your waist is smaller, you'll need to take in the side seams. Knowing your measurements is empowering! It's the first step towards creating clothes that fit you perfectly.
Measurement | How to Measure | Why It's Important |
|---|---|---|
Bust | Around the fullest part of your bust | Ensures the blouse fits comfortably across the chest |
Waist | Around your natural waistline | Defines the shape of the blouse |
Hips | Around the fullest part of your hips | Allows the blouse to drape properly |
Bust Apex | Shoulder to bust point | Helps position darts correctly |
Shoulder to Waist | Shoulder to natural waist | Determines the overall length of the blouse |
Common Pattern Adjustments
Alright, let's dive into some common pattern adjustments for your 32 size blouse paper cutting project. One of the most frequent adjustments is a bust adjustment (FBA or SBA). If you have a larger bust, you'll need to do a Full Bust Adjustment (FBA) to add extra room in the bust area. If you have a smaller bust, you'll do a Small Bust Adjustment (SBA) to remove excess fabric. There are tons of tutorials online that can walk you through these adjustments step-by-step.
Another common adjustment is lengthening or shortening the bodice. If you're taller or shorter than the pattern's standard height, you'll need to adjust the bodice length accordingly. You can also adjust the shoulder width, sleeve length, and neckline shape to suit your preferences. The key is to experiment and don't be afraid to make mistakes. Sewing is a learning process, and every project is an opportunity to improve your skills.
Troubleshooting Common Issues with 32 Size Blouse Paper Cutting
Troubleshooting Common Issues with 32 Size Blouse Paper Cutting
Fabric Fails and How to Fix Them
Alright, let's talk about those moments when your 32 size blouse paper cutting project goes a little sideways. One common issue is fabric fraying. Delicate fabrics like silk or rayon can be a pain to work with because they tend to unravel at the edges. The solution? Finish your seams! Use a serger, a zigzag stitch, or bias tape to encase the raw edges and prevent fraying. Another fabric problem is stretching. Knit fabrics, in particular, can stretch out of shape if you're not careful. Use a walking foot on your sewing machine to help feed the fabric evenly and prevent distortion. And always, always pre-wash your fabric to avoid shrinkage after you've finished your blouse!
What about those mysterious stains that seem to appear out of nowhere? Keep a stain remover pen handy for those little mishaps. And for stubborn wrinkles, invest in a good iron and ironing board. Pressing your fabric before cutting and during sewing will make a huge difference in the final result. Remember, a little bit of prevention goes a long way when it comes to fabric fails. So, take your time, be patient, and don't be afraid to experiment. Every mistake is a learning opportunity!
Problem | Possible Solution |
|---|---|
Fabric Fraying | Finish seams with a serger, zigzag stitch, or bias tape |
Fabric Stretching | Use a walking foot on your sewing machine |
Mysterious Stains | Keep a stain remover pen handy |
Stubborn Wrinkles | Invest in a good iron and ironing board |
Pattern Puzzle Solutions
Ever feel like your 32 size blouse paper cutting pattern is speaking a foreign language? Don't worry, you're not alone! One common pattern puzzle is deciphering the markings. Take the time to study the pattern key and understand what each symbol means. Another tricky part is matching the notches. These little triangles are essential for aligning pattern pieces correctly. Make sure you clip the notches carefully, but don't cut past the seam allowance!
What if your pattern doesn't fit quite right? That's where pattern adjustments come in. If your bust is larger than the pattern's bust measurement, you'll need to do a Full Bust Adjustment (FBA). If your waist is smaller, you'll need to take in the side seams. There are tons of resources online that can guide you through these adjustments. And don't be afraid to ask for help! Join a sewing community or take a class to learn from experienced sewists. Remember, sewing is a journey, not a destination. Enjoy the process and celebrate your progress along the way!
Conclusion: Your Journey to Perfectly Fitted Blouses Begins Now
You've now got the knowledge to tackle 32 size blouse paper cutting like a pro. From understanding the basics to customizing your pattern for that dream fit, you’re equipped to create blouses that truly celebrate your shape. Don’t be afraid to experiment with different fabrics, embellishments, and design tweaks to make each piece uniquely yours. The journey of sewing is all about learning, growing, and expressing your creativity. So grab your pattern, thread your needle, and start stitching your way to a wardrobe filled with perfectly fitted, handmade blouses that you’ll be proud to wear. Happy sewing!